Cellular Webcam

A bit ago I posted about setting up an RPi with cellular connectivity which could be used for any number of ideas. One I mentioned was a remote webcam.

I took the basic setup I had shown before, and attached a small solar panel, sealed it in a watertight enclosure, and placed it on some national forest land adjoining a nearby mountain pass.

I used a small arduino board and a mosfet to control power to the RPi. It woke up once an hour to take a photo and upload some telemetry and a thumbnail to my server over the cell connection. If there was a thumbnail I wanted a better look at, or to establish a ssh connection for admin, there were command files I could leave in place on the server that would instruct the RPi to perform additional actions before going back to sleep.

Every so often as the SD card got full, I would drive up and park nearby, and download the full size files over wifi connected directly to the RPi.

Unfortunately, in summer the unit stopped responding and had to be retrieved. Once I was able to get it home and look at it, I found the RPi’s SD card had died, so it couldn’t boot up to do anything. I’m usually careful to buy quality name brand SD cards, but it appears this time one slipped through and lead to the failure.

Posted in Electronics, Projects, Technology | Leave a comment

New RNG Revision

Speaking with a few folks I chat with regularly there ended up being some renewed demand for the Random Number Generator USB Sticks I had made a few years ago.

I didn’t have any of the original ones remaining, so I did a minor board revision to make them a little bit easier to assemble.

Once the new boards were assembled, I grabbed a bunch of them to start gathering data to test the quality, and tune the stick firmware, as well as the daemon software to get the fastest speed, and the best whitening possible.

It was nice to revisit this older project and give it some new life, as well as get a nice handful of them out to other folks who can get good use out of them. As always you can get a taste of their entropy for yourself via my Entropy Service.

Posted in Electronics, Projects, Random | Leave a comment

Cellular IoT Connectivity

With the recent interest in “Internet of Things” devices, most of the major cellular carriers have started offering very affordable plans targeted at this market.

  • AT&T is offering prepaid data, and $1/month/sim card at https://marketplace.att.com/iot-connectivity
  • T-Mobile is offering unlimited data (speed restricted) with a minimum of 2 SIMs at $5/month each, plus $25/yr for the plan. Assuming you can even get started. Unlike AT&T, they require you to speak with a sales rep, and I haven’t been able to get them to respond to me more than once. A friend has had a similar experience trying to get started. http://iot.t-mobile.com/
  • Verizon seems to be the laggard of the bunch, with very expensive plans. Their model may work alright if you had a large number of devices to use on the pool, but for one or two, the price difference is massive. https://www.verizonwireless.com/biz/plans/m2m-business-plans/

I was interested in setting up a Raspberry Pi with some cellular connectivity for use in a number of potential projects. Some quick ideas might be:

  • An OOB (Out Of Band) connection to your servers if your main internet link dies, you can still manage them.
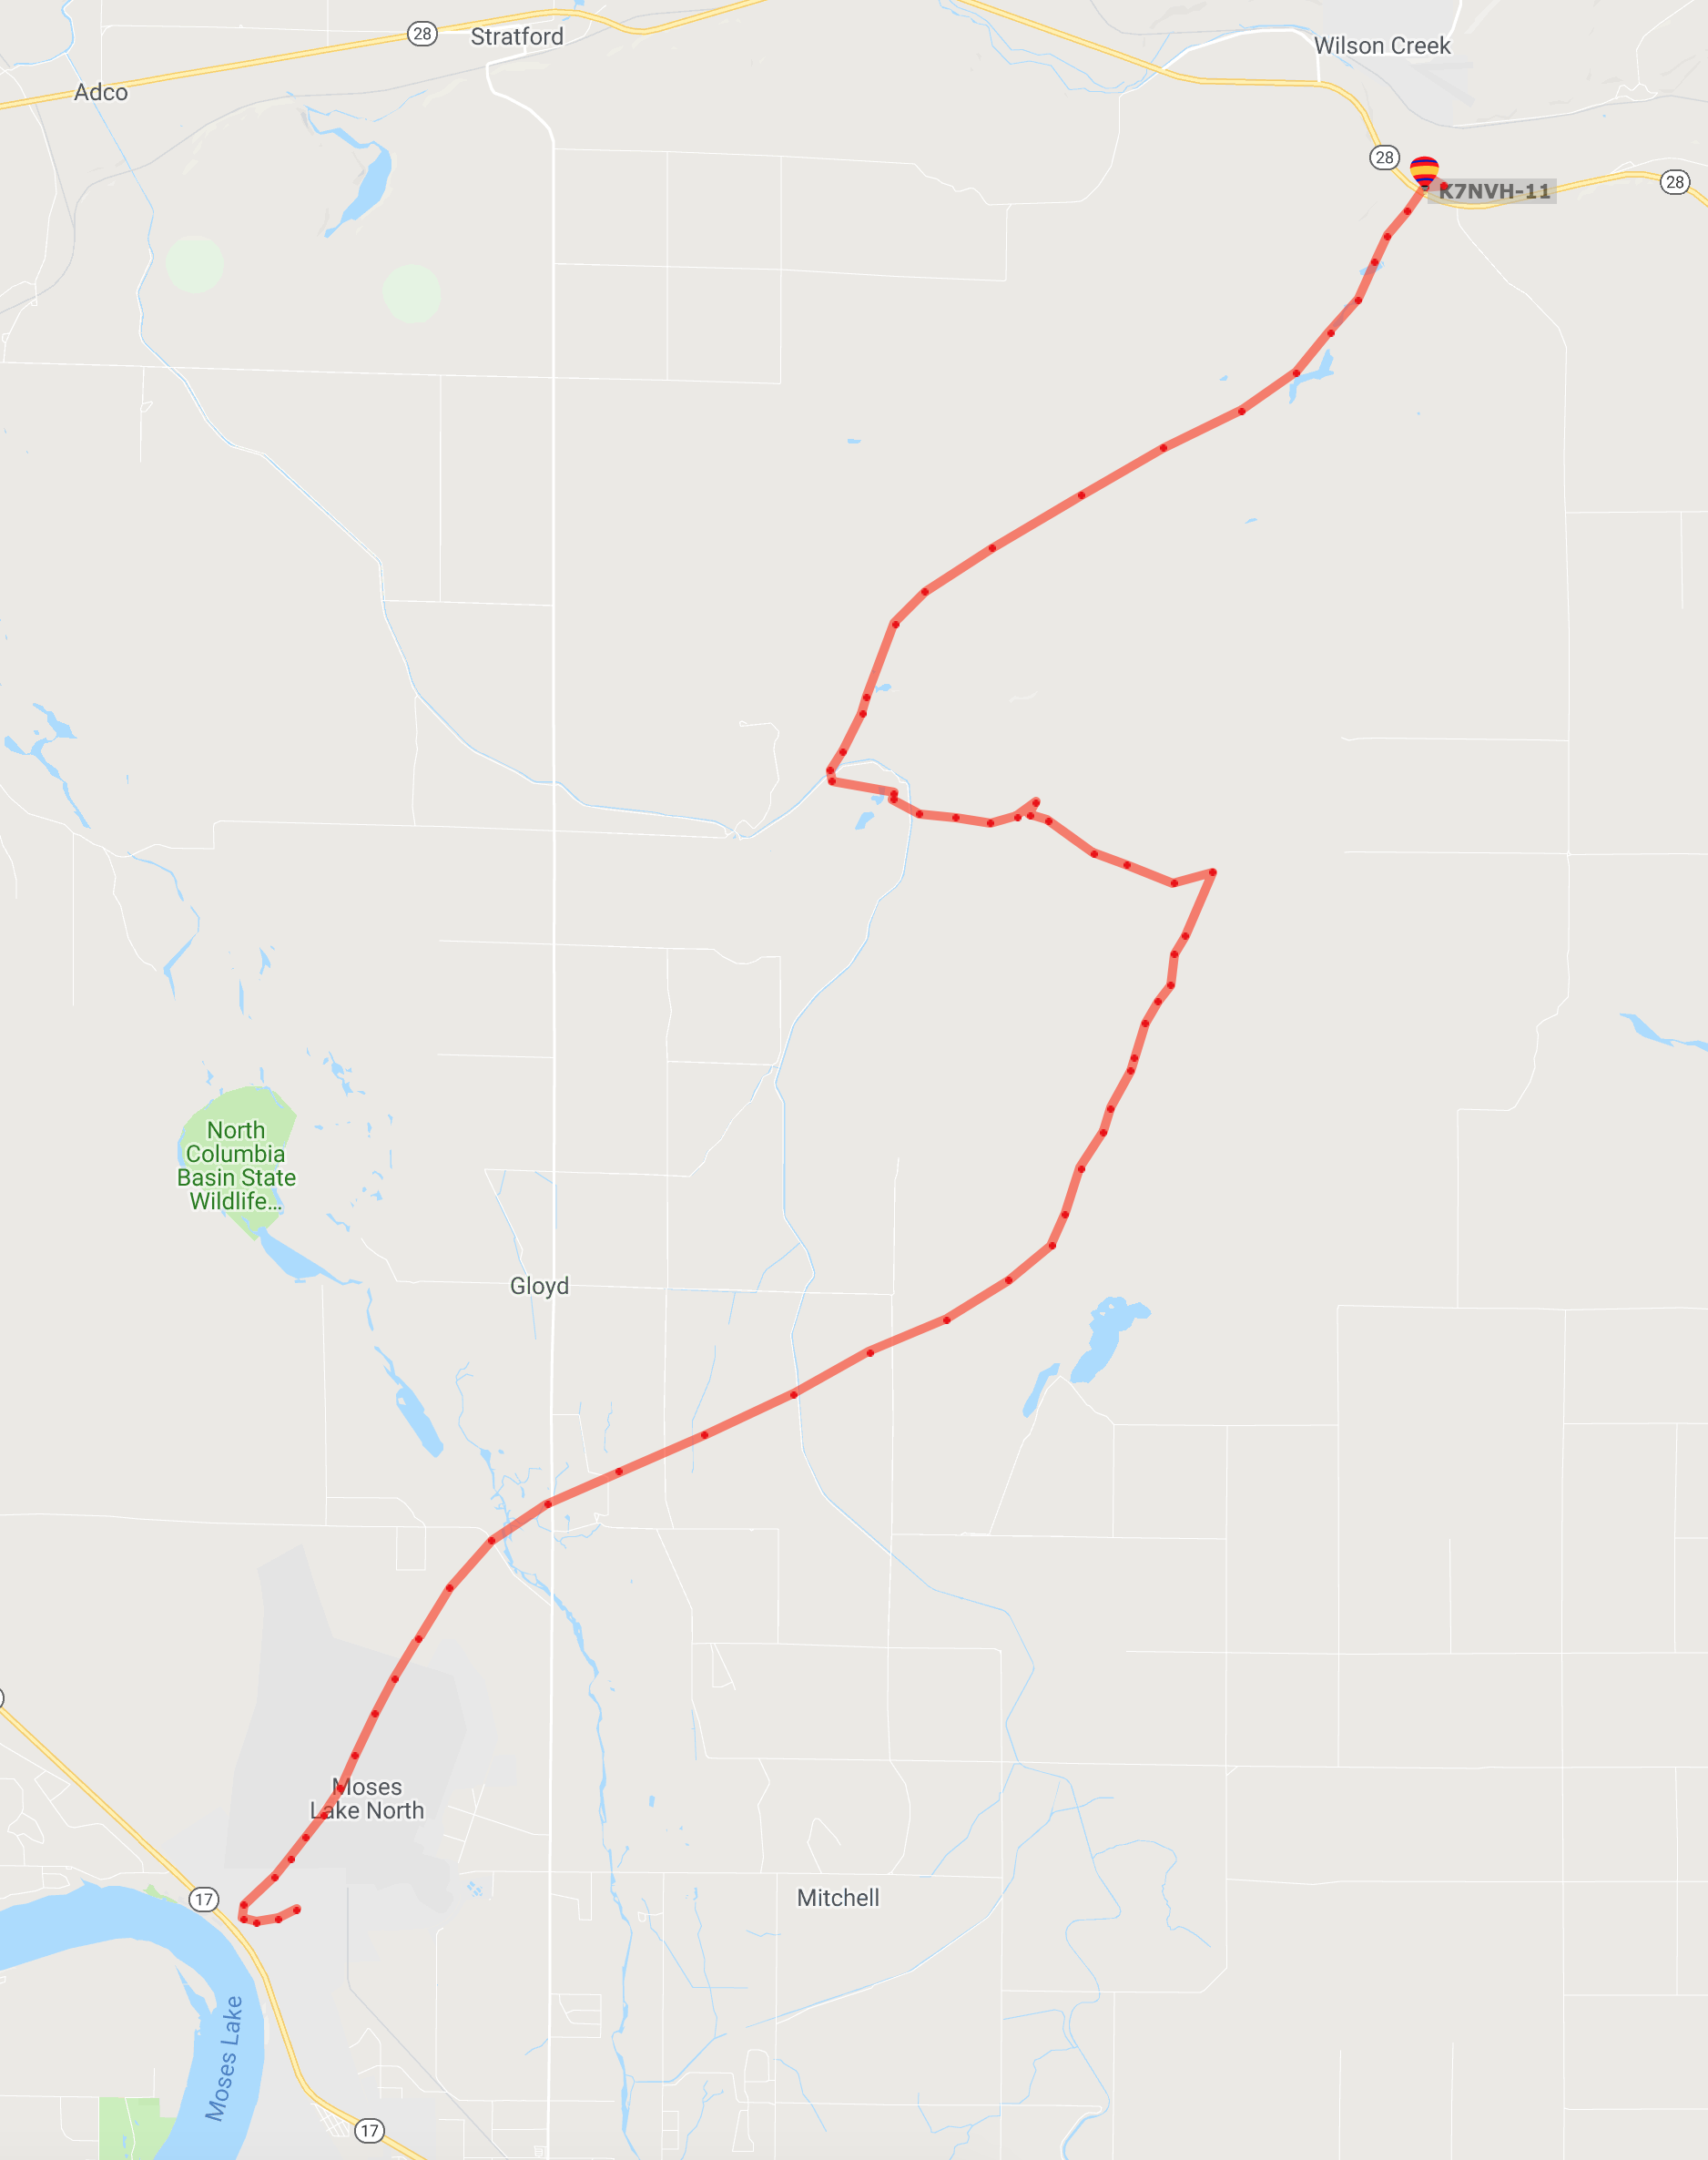
  • A portable iGate for mobile packet operations. This could be useful for example with the high altitude balloon flights I participate in, to have a ground station set up with connectivity.
  • Add a solar panel, some power management, and a camera for a wilderness webcam. Find a forest/mountain/beach/whatever with a bit of cell service, and set up a webcam.

I was looking around at various options for the modem itself, and happened upon a module set up for use with embedded systems from Adafruit (https://www.adafruit.com/product/3147) and decided to give it a try paired with a Raspberry Pi Zero W.

This module, which supports 3G and 2G networks, I decided to pair with AT&T’s IoT plans, one because AT&T has a 3G network whereas T-Mobile’s network is 2G, and because I couldn’t get T-Mobile’s sales staff to respond in a timely manner.

The setup is pretty straightforward, and Adafruit has put together a nice tutorial on how to hook up the module to the Raspberry Pi’s GPIO pins. https://learn.adafruit.com/fona-tethering-to-raspberry-pi-or-beaglebone-black/wiring?view=all

Note that their tutorial is based around their older modules that don’t support 3G connectivity, so they make some warnings about carrier selection, but if you chose the 3G capable module I listed above, the instructions are just the same. You’ll wire the module to the Pi’s serial GPIO pins, ground, and 3.3V power to set the voltage levels.

At this point, it’s just configuring the software as described in the tutorial. I’ll add a note of caution here, the serial device naming scheme on the Pis has changed in the Pi3 and PiZero families versus the older Pis. On the newer Pis, /dev/ttyAMA0 is not the hardware UART by default, and instead you should be using /dev/serial0. So in the PPP peers file you create, make sure to update it appropriately for the right serial device.

Add a little script to startup a reverse SSH tunnel to a device you control when the Pi boots up, and now you’ve got a device you can drop anywhere with cell service, and remotely manage it.

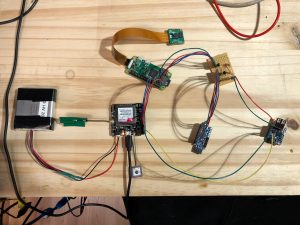
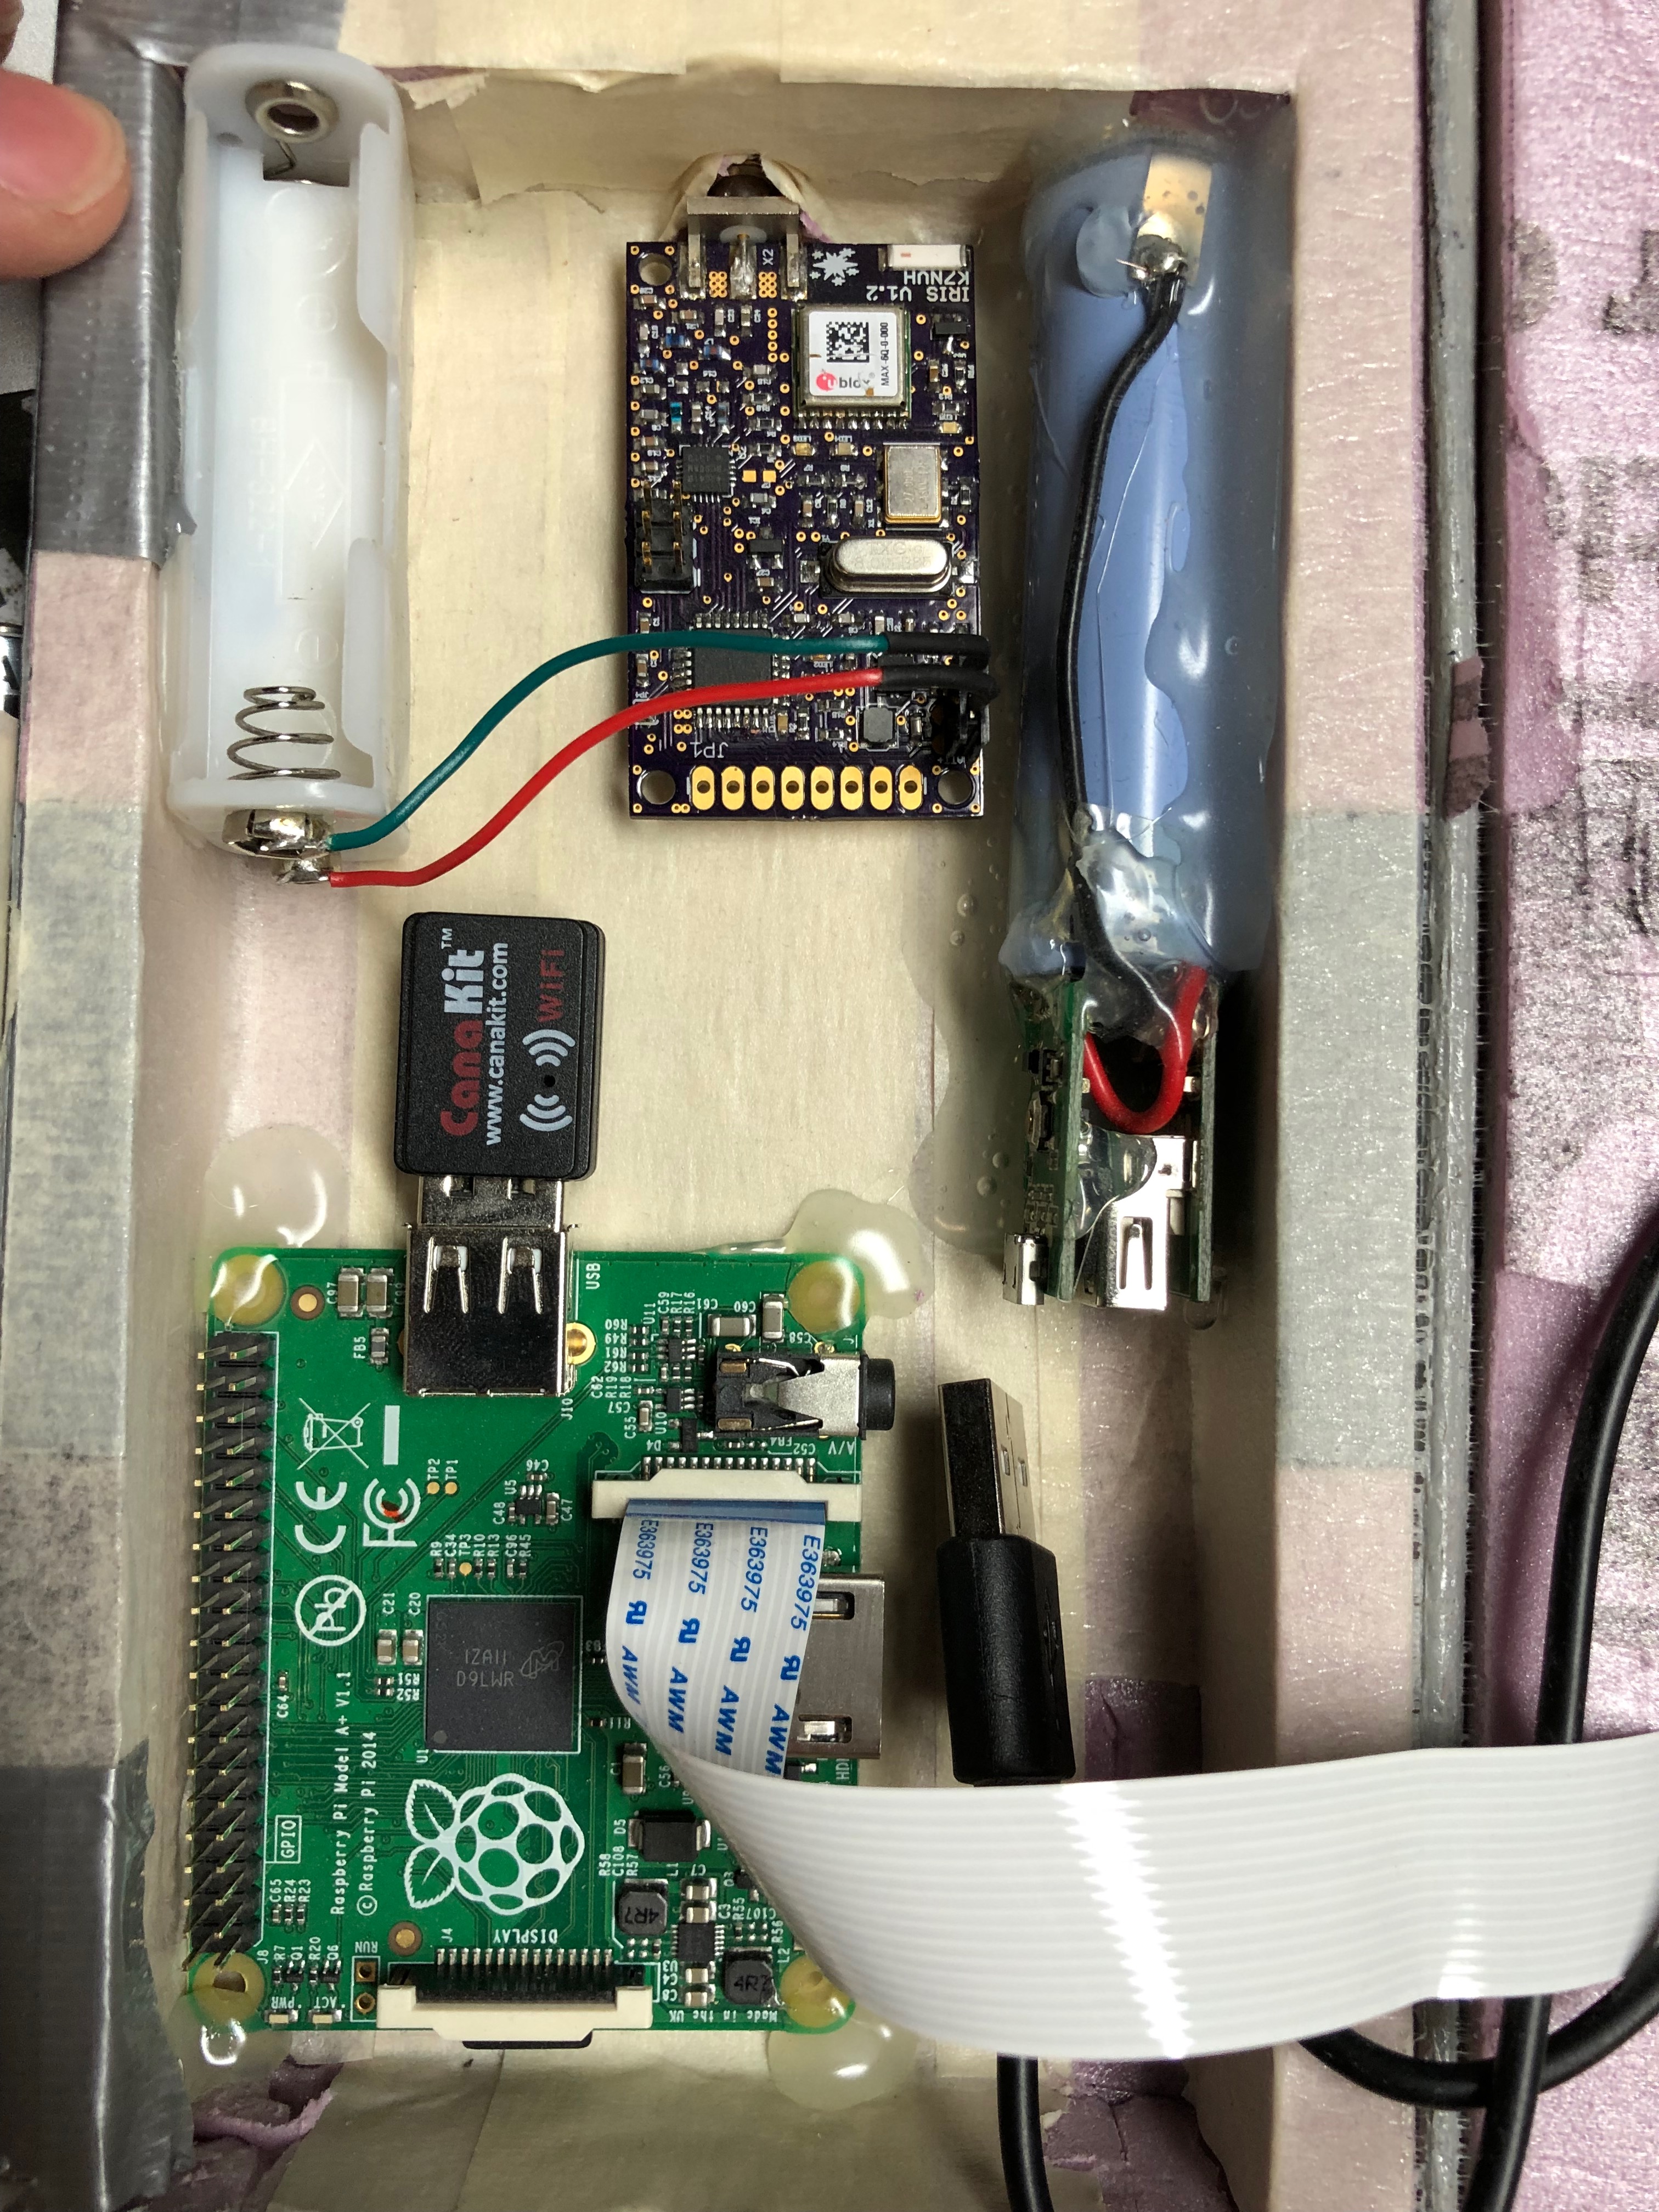
Here’s a quick shot of my setup in development. Bottom row from left to right is some batteries, the FONA cell module, a Arduino Pro Mini, and a small boost regulator to power the Pi. The top row is the Pi Zero W with attached camera, and a proto board to control power on/off to the Pi and handle voltage translation between the Pi and the Arduino Pro Mini.

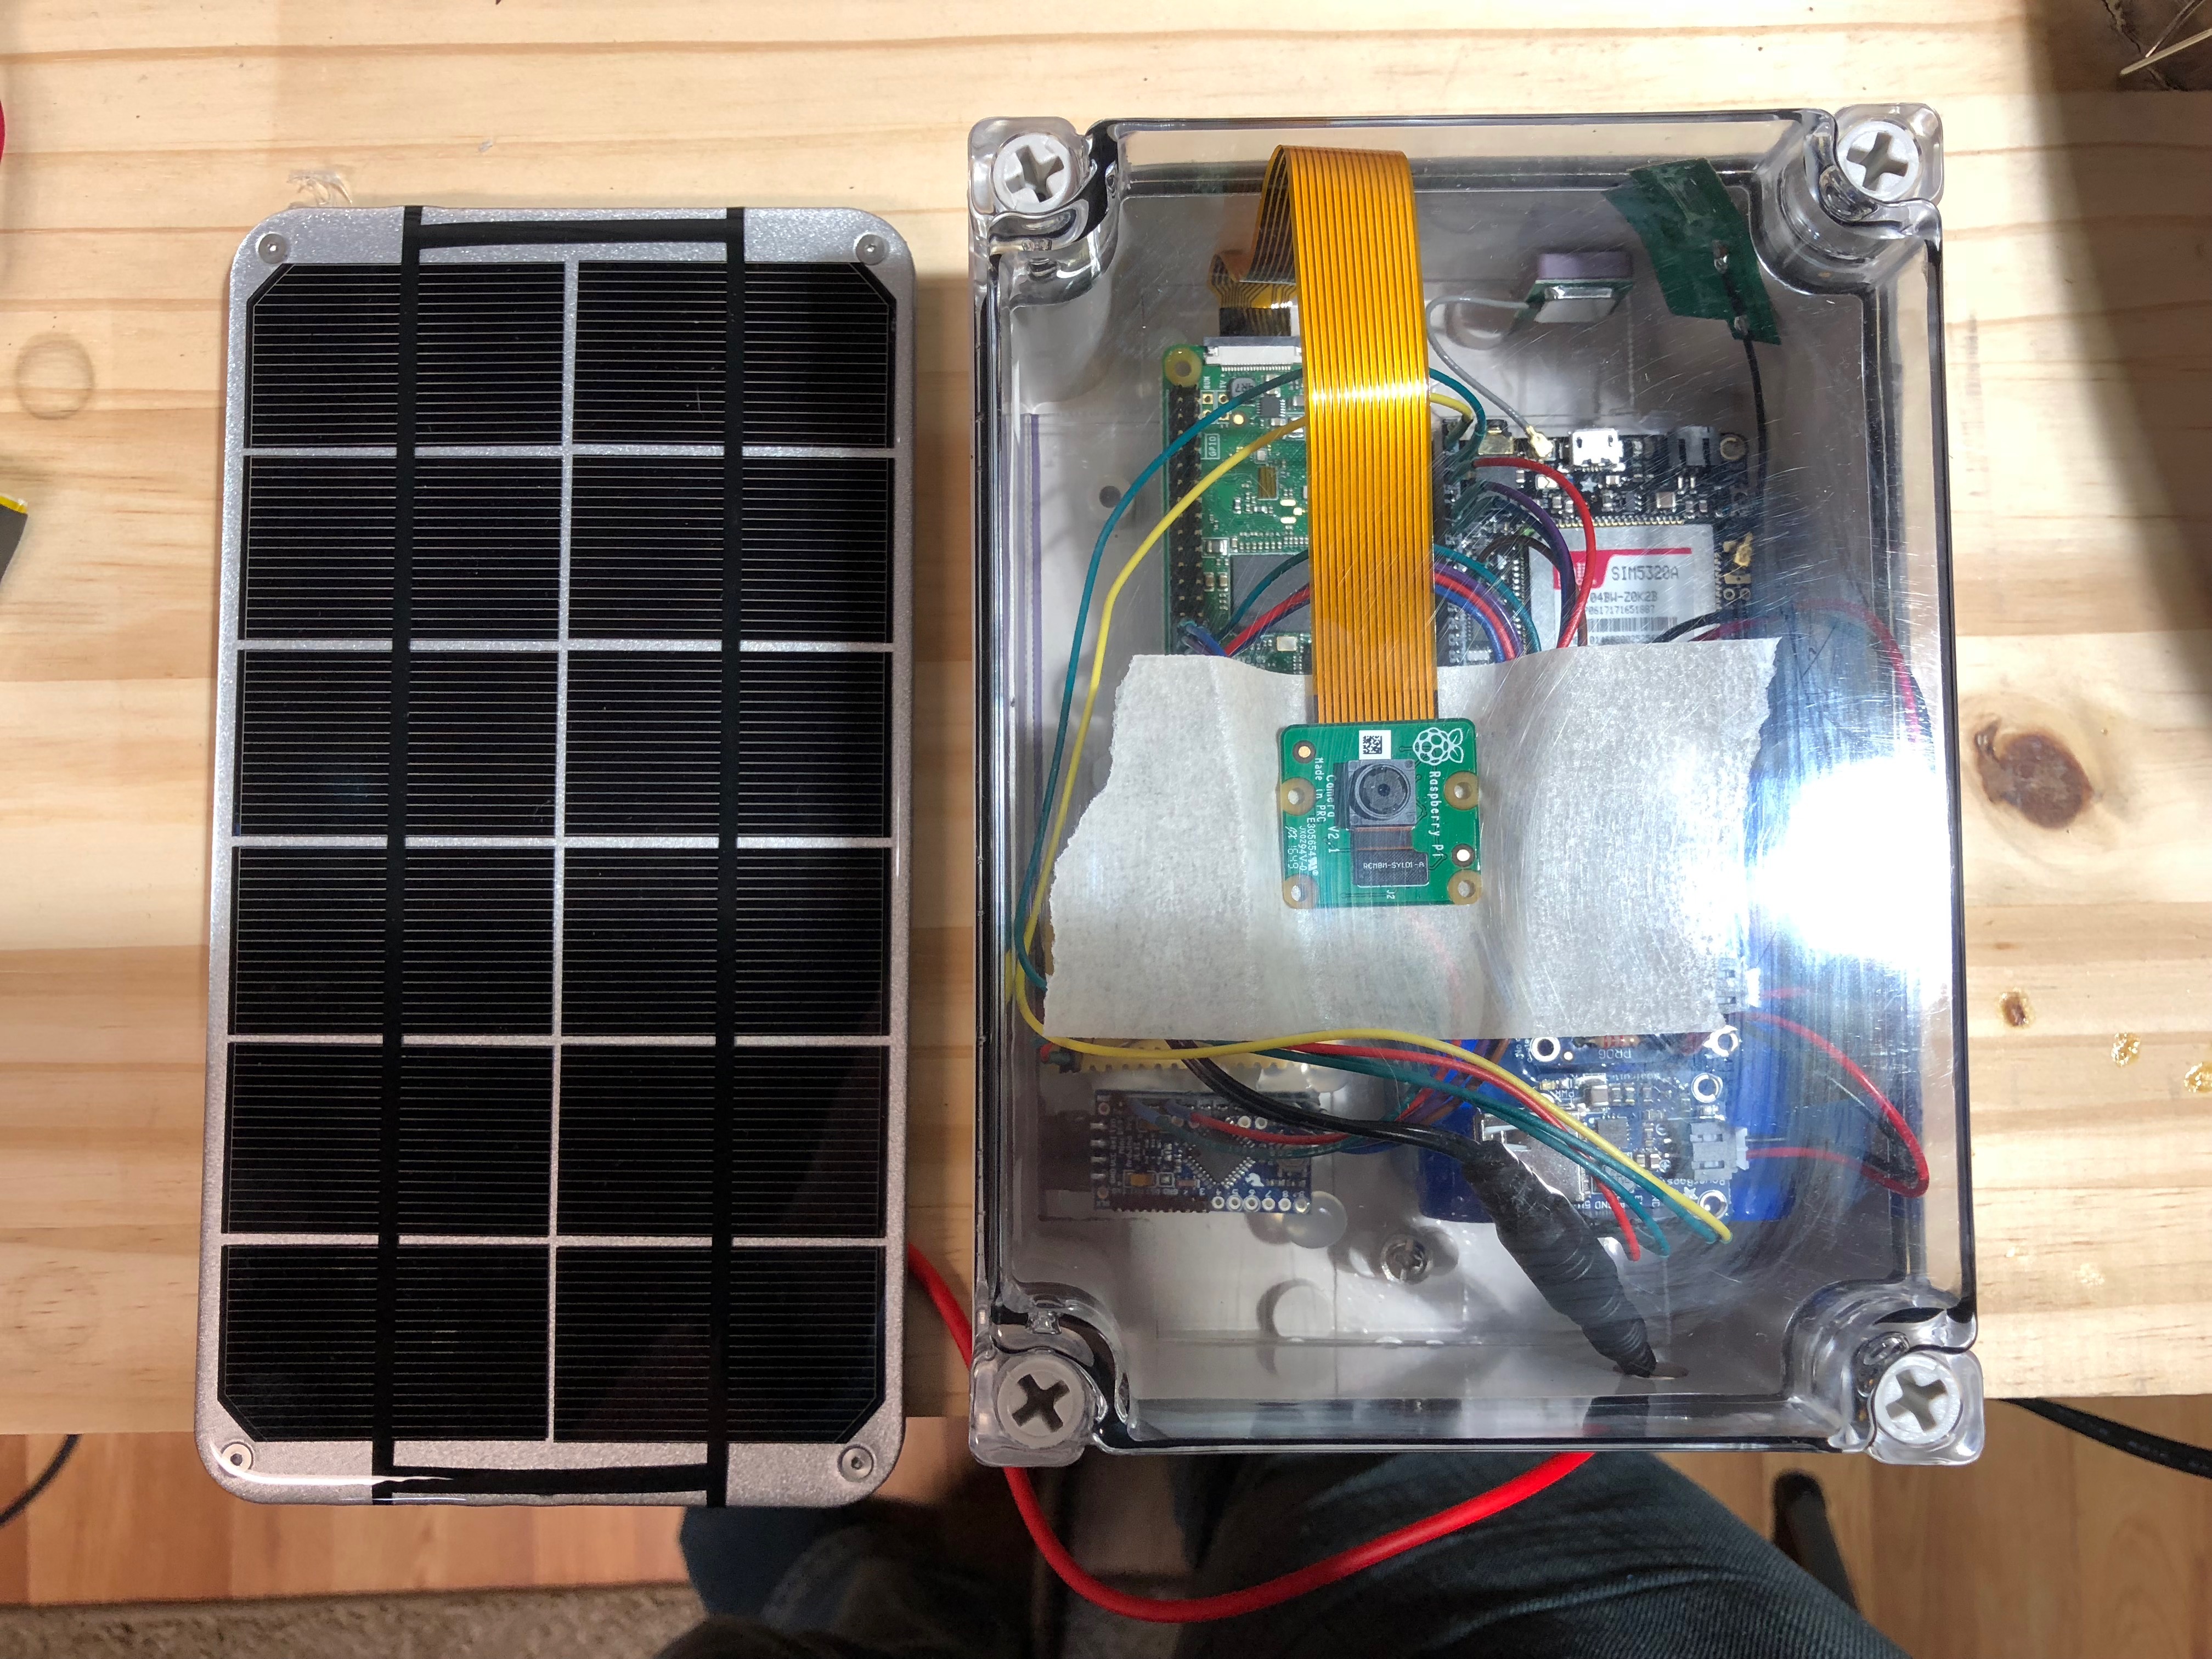
The arduino controls power to the Pi, so we can shut down the pi and the cell module for a very low draw sleep, wake up occasionally to take a picture or perform some other task, then go back to sleep again. I plan to add some solar charging to the current setup, and it should be about done at that point.

Posted in Electronics, Technology | Leave a comment

New POES Receiver Setup

For the last few years I have off and on run a receiver dedicated to picking up the image transmissions from NOAA’s POES series of satellites.

The POES satellites are polar orbiting weather satellites that transmit image data down, and are available to anyone who cares to set up a station.

In the past, I have used a receiver I built as a kit, and it worked alright, but getting good performance out of it has been troublesome, so the images often had issues with noise, or not faithfully reproducing the actual data the satellites were sending.

I was working on getting my station tuned up again recently, and decided to try using a USB SDR (Software Defined Radio) attached to a Raspberry Pi, to see if I could get better results, and I have to say I’m pleased with the answer.

The first image is just contrast enhanced, and the map overlay was placed on, the second is a false color enhancement that helps show clouds.

Posted in Ham Radio, Weather | 1 Comment

K7NVH PoE PDU

A little while ago, I posted about using surface mount stencils for the first time on a new project. I’ve been able to get a couple of the units completed, and with some help from a friend with milling the front panel of the case, the units are looking really nice.

This is a PDU based on my earlier design, but modified to better support PoE (Power over Ethernet) devices. The ports are designed as a passthrough, so one port will connect to your switch, the other will connect to the device and receive power. It’s designed to support gigabit connectivity, and handle PoE+ loads.

This new revision makes the project much more valuable for the HamWAN project on our remote sites, where all of our equipment is PoE.

Posted in Electronics, Projects, Technology | Leave a comment