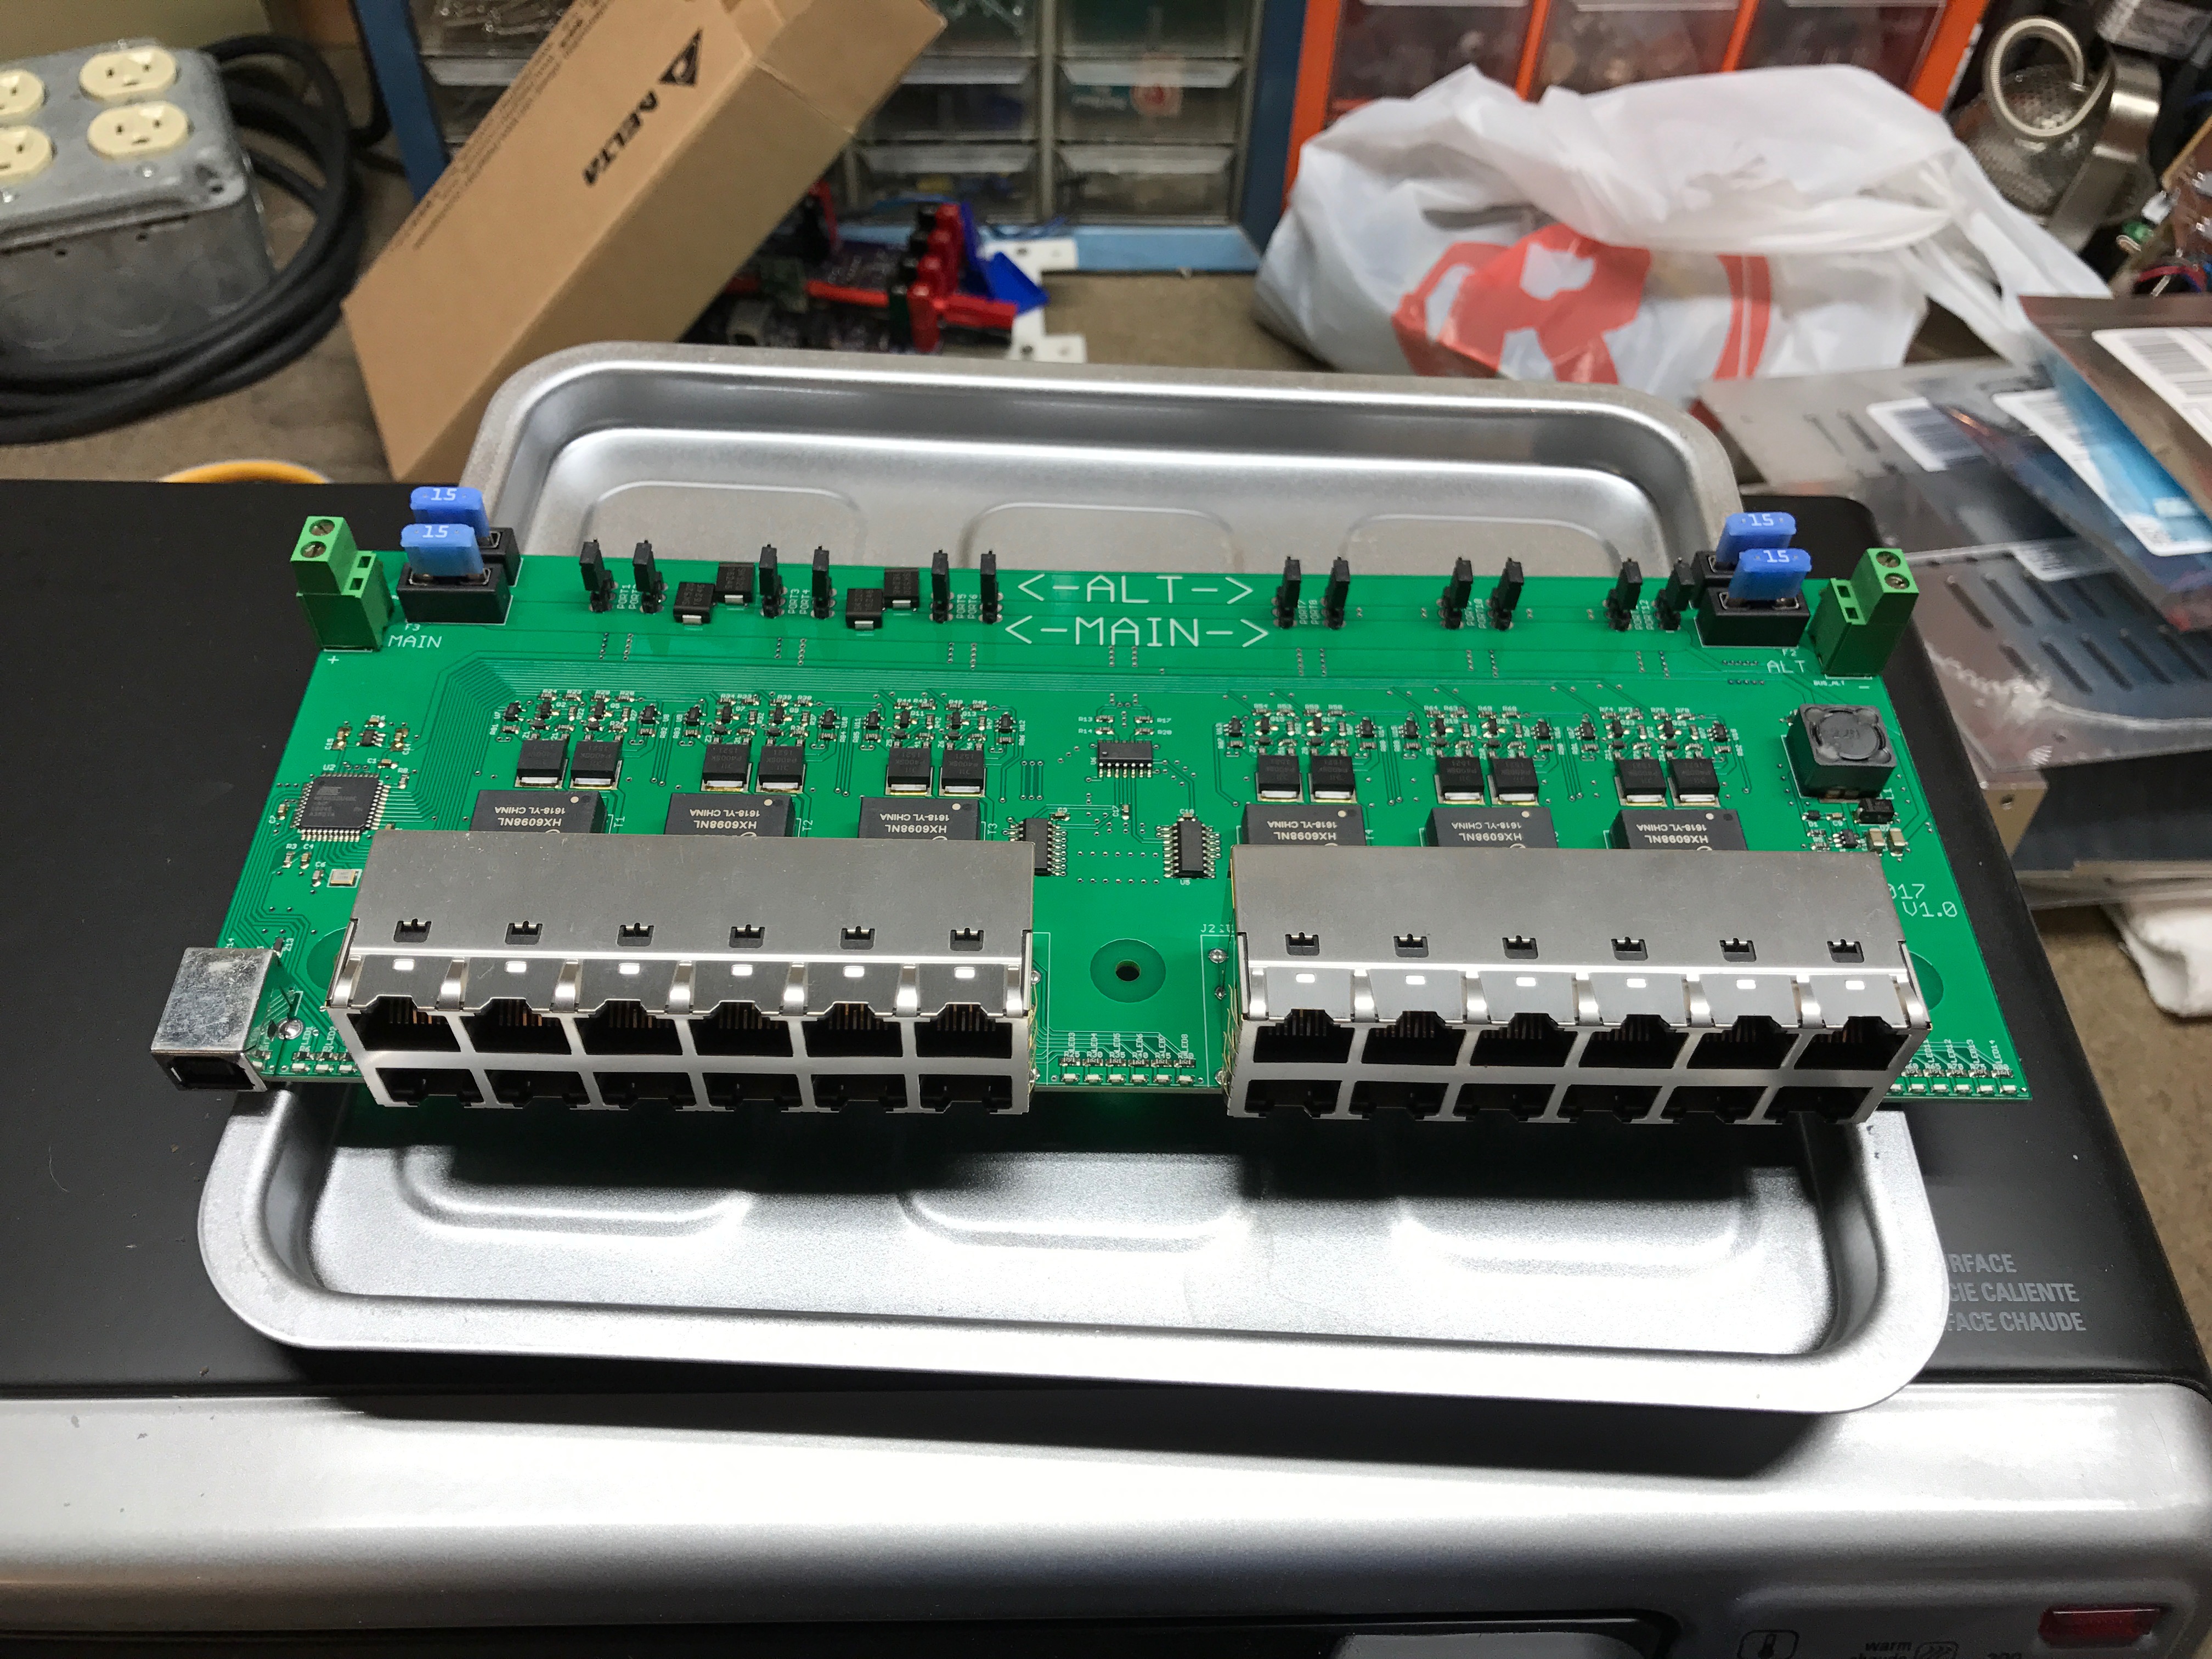
I’ve been working on a project recently that calls for a pretty sizable board, with a fair number of parts on it (4″ x 10″ board size).
Traditionally when I’ve assembled these boards, I’ve either used wire solder and soldered parts on by hand, or more recently, been using a syringe with solder paste, placing all the parts on, and then placing the board in a toaster oven to reflow all the parts at once.
For a board this large though, either prospect was going to be pretty tedious, on top of placing the components to begin with, so I decided that I was going to try using a solder paste stencil this time.
A stencil is simply a sheet, usually of stainless steel or mylar plastic, with precisely cut holes in it where you want the solder paste to go. You squeegee the paste over the top, and it deposits just the right amount, right where you need it.
I got this stencil from OSH Stencils, and it was pretty inexpensive considering again that this is a large board.
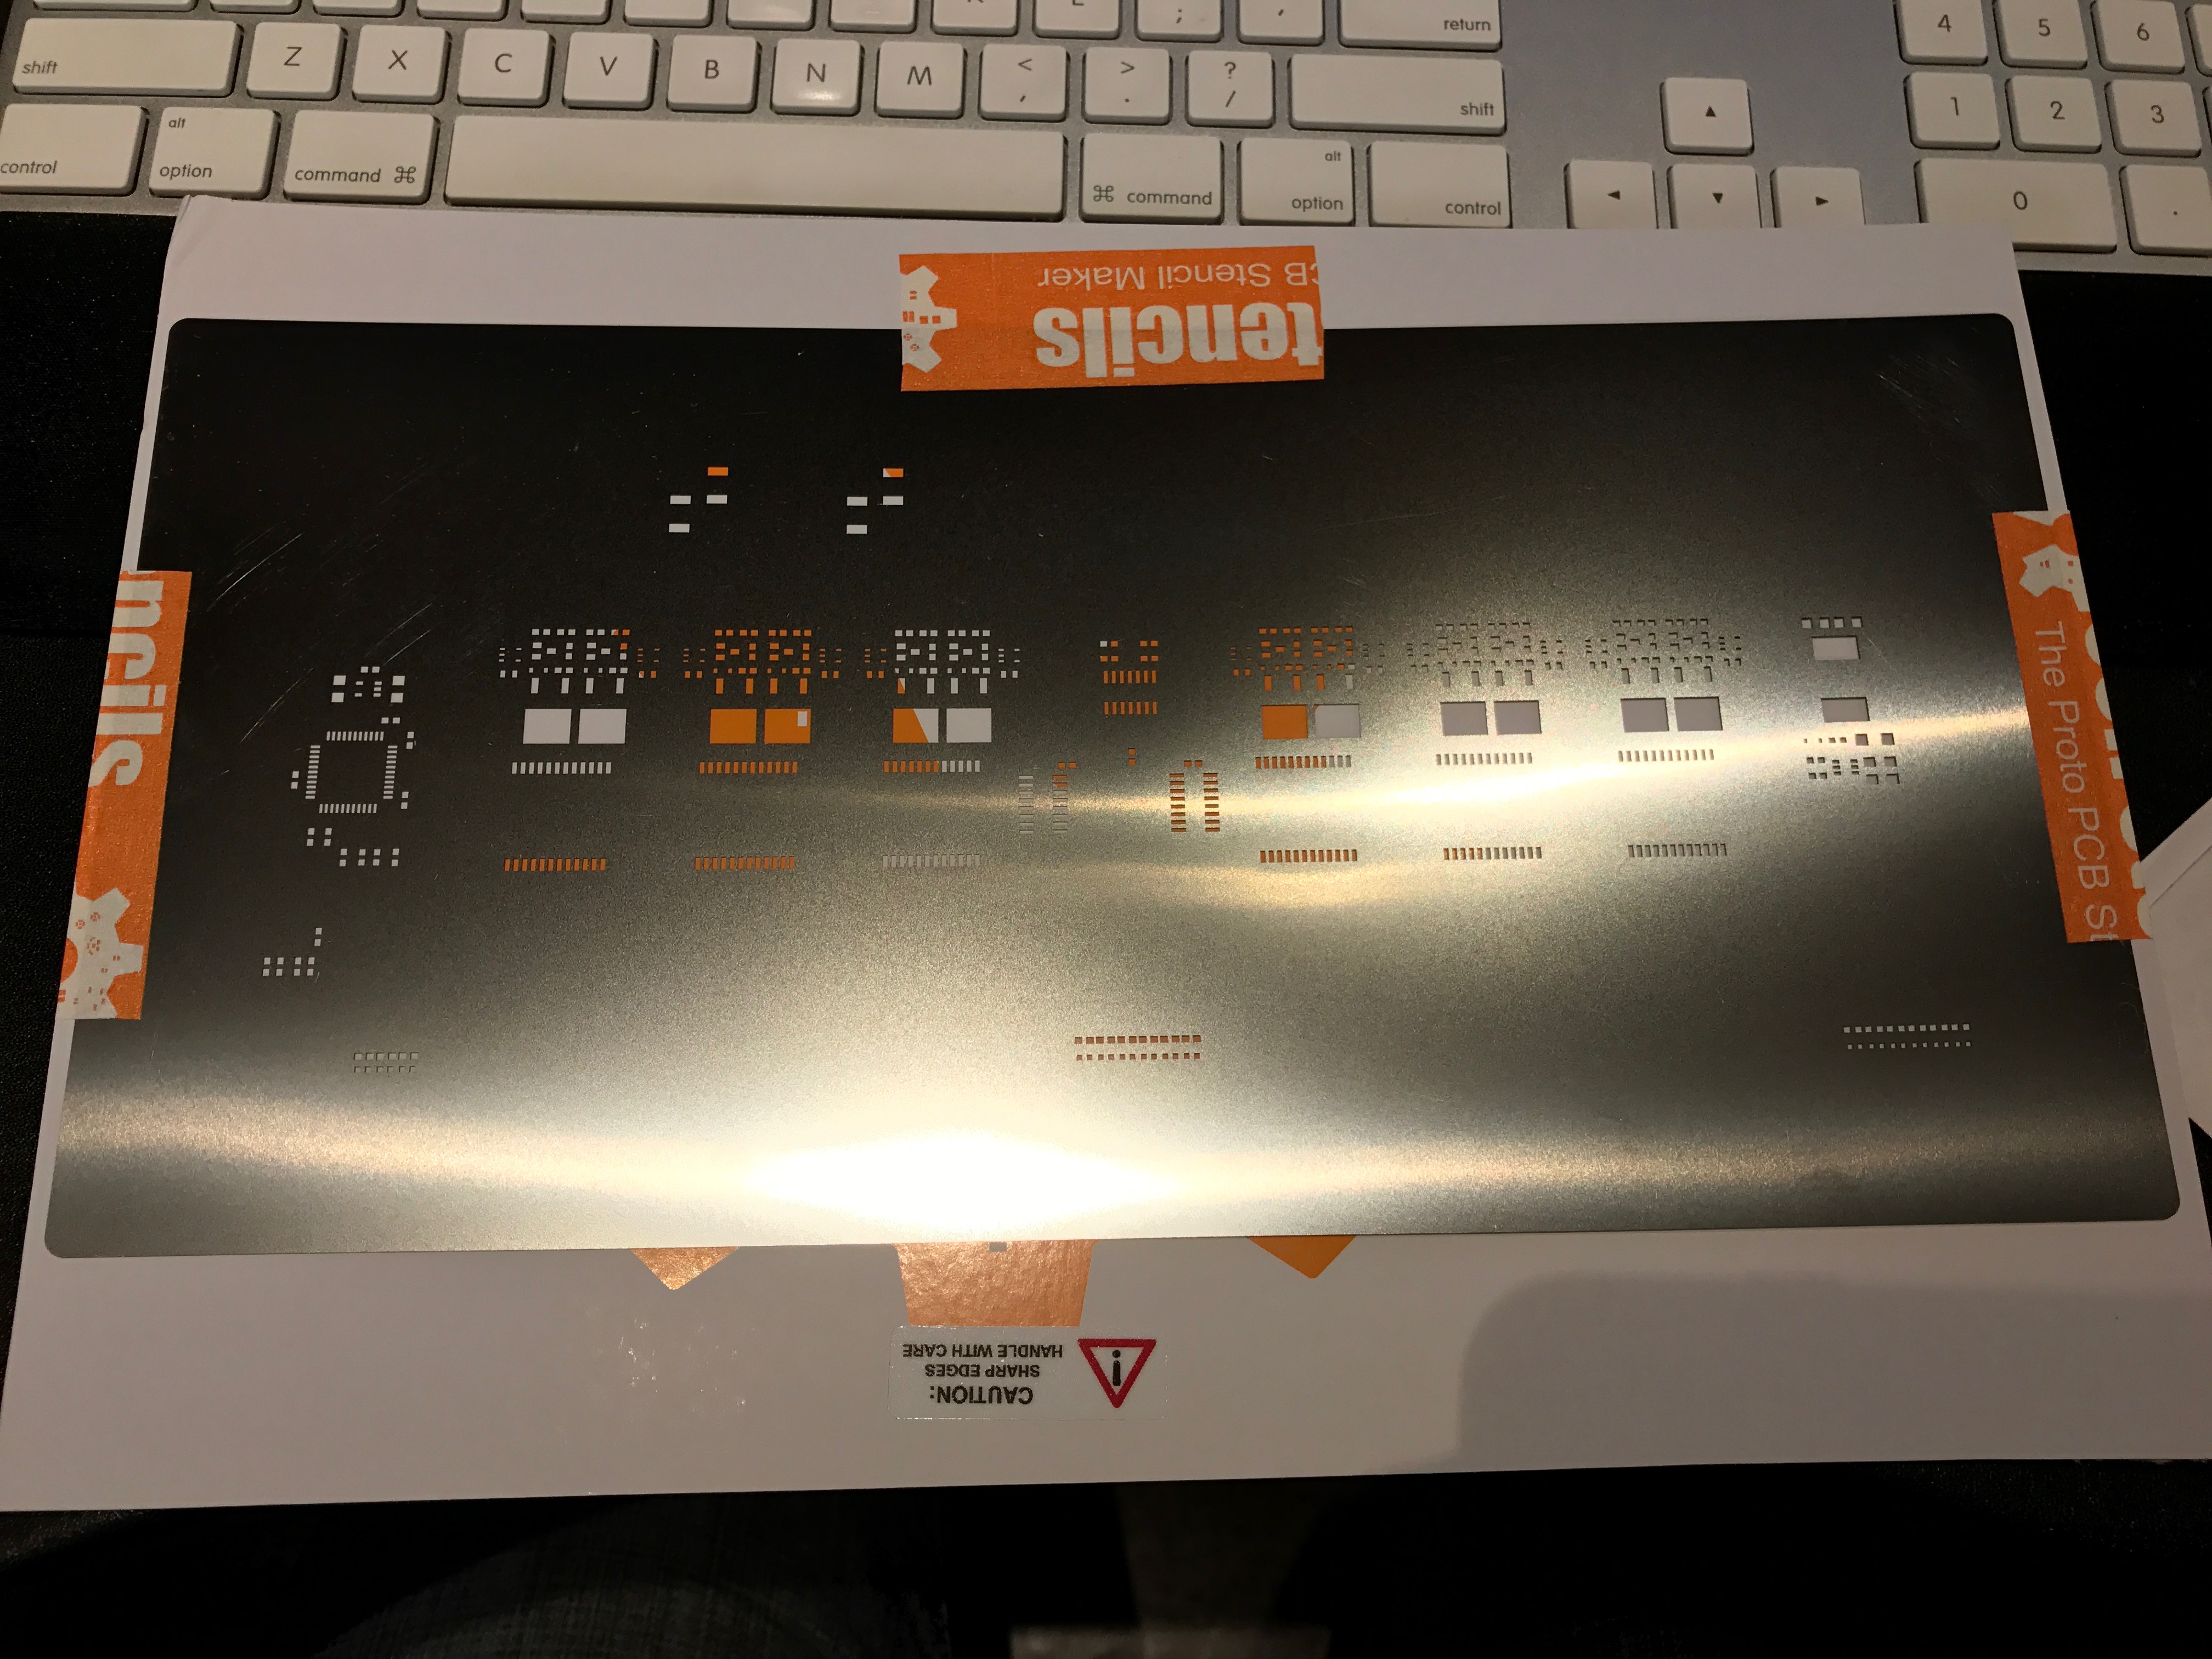
The critical thing about it is getting it lined up properly with the board itself. Laying down just the right amount of paste in the wrong spot doesn’t help any, so the pcb, some framing supports, and the stencil were all taped down to prevent any movement.

After placing all the parts and reflowing, I had a perfectly soldered board.

The through hole parts still have to be soldered on manually though. No wave soldering for me yet…