As a previous post mentioned, I got a new 2012 Subaru Outback recently, and since then, I have decided to put a trailer hitch on it, so I can pull a small trailer with my motorcycle on it.
I did a lot of browsing around on subaruoutback.org, looking at photos of other people’s hitch installs, specifically looking for things like how far below the bumper does it hang, and how far out from the rear of the bumper does it come. For me, neither was particularly desirable. I like the aesthetics of my car, and didn’t want some big hitch sticking out the back.
I ended up finding a hitch, which from what I can tell sits the closest to the bumper, and doesn’t stick out at all. It’s the Torklift EcoHitch Stealth for the Subaru Outback of 2010 or newer, and a 2″ receiver.
It’s not the cheapest model around, but it fits my requirements best, and in my experience Torklift makes good products.
Anyway, in summary, I ordered one, and it arrived today. The weather forecast said the weekend wasn’t going to be fun, so I decided I’d put it on now. I took a whole bunch of photos, so I’ll go through the install steps, noting where I differed from the provided instructions, and provide some pictures for visual aides.
1. Unpack Hitch
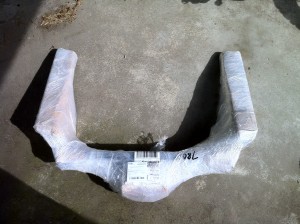
The hitch doesn’t come in a box, it comes wrapped in some cardboard and a crapton of plastic wrap. It’ll take a few minutes to get off.
2. Lower The Exhaust
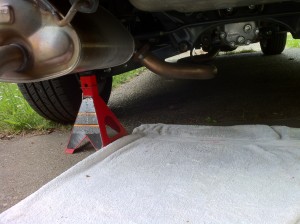
This portion is pretty much as explained in the Torklift instructions. In summary, there’s three rubber hangers along the exhaust pipe near the rear of the vehicle. Two right by the muffler can, and one up a little farther near the axle. My car is pretty new, so these haven’t gotten too grimy, so they were easy to get off. If your car is older, it’s been recommended to use something like WD-40 to loosen them up.
Also, don’t drop it all the way to the ground. The tailpipe shouldn’t flex that far. I used a jackstand to hold the tailpipe up since I didn’t need the jackstands for the car as it has lots of ground clearance.
3. Remove the Bumper Fascia
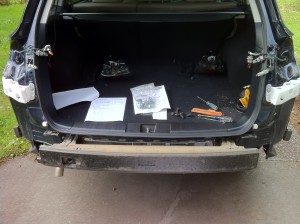
This step isn’t actually in the Torklift instructions, but IS in the instructions for the Subaru hitch. Removing the bumper fascia and the bumper rail gets you access to the ends of the frame rails, which 1. makes it much easier to get the bolts in to actually mount the hitch, 2. solves a problem we’ll run into later, 3. Makes it so we don’t have to tear apart all the floor of the trunk. In this case we’re trading pulling off the bumper for pulling out the trunk stuff, and gaining easier access and a problem fix. I HIGHLY RECOMMEND THIS METHOD.
Here’s the link to the Subaru instructions which tell you how to remove the fascia. Subaru
4. Remove the Bumper Rail
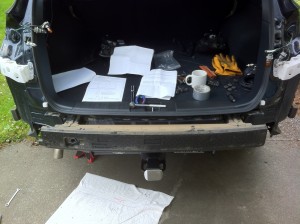
Same deal as step 3. Just getting access to the end rails. This involves pulling off eight 14mm nuts. Then the rail comes off.
5. Place the Mounting Bolts
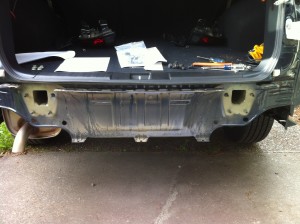
The included hardware packet comes with a bolt fishing wire, and after pulling out a few rubber plugs from the bottom of the frame rails, simply fish the plates, lock washers, and bolts through the holes. One of the holes on the Driver’s side is blocked by a piece of heat shielding. I undid the four small bolts holding on the heat shield, cut out about a 2″x2″ square where the hole is with tin snips, and reattached the heat shield before putting that mounting bolt in.
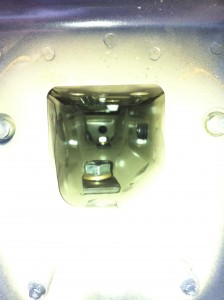
6. Hang the Hitch
This part would be easier with a friend, but was entirely doable by myself. The hitch is just rather heavy and unwieldy. Anyway, hold it up, and being careful not to push the bolts back up into the rails, just thread the nuts on to hang the hitch. Don’t worry about tightening them yet.
Also, the Torklift instructions say to bend the middle bumper tab all the way back, and the two side tabs down. These instructions assume you’ve left the bumper on. You still need to bend the center one all the way back, but leave the two side ones where they are.
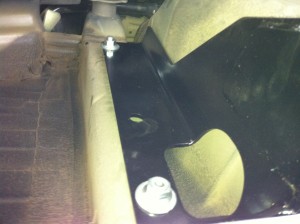
7. Construct A Tool
If you decided to skip a step and try to tighten the nuts onto the bolts some, you may have noticed that the bolts in the rails just spin. I’ve seen in the hardware kits for other hitches that they’ll use square head bolts and the plate will have a small indent to catch the top of the bolt to keep it from spinning. For some reason, Torklift didn’t do that or something similar. In fact, their recommended install method has you fish the bolts through a hole in the floor of the trunk, which means you can’t get a wrench or ratchet to the tops. Perhaps they use an air wrench, and it manages to overcome the top spinning. I don’t have an air wrench, so this poses a problem. I constructed a tool to fit in the open ends of the frame rails, to hold the top of the bolts. It’s my (patent pending) Hitch Helper!
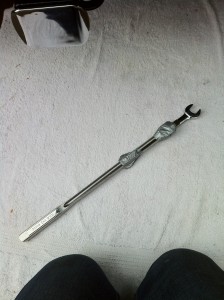
It’s just a 3/4″ open end wrench, duct taped to a long breaker bar. The wrench is the right one for the top of the bolts, and the bar just gives me enough length to get it all the way into the frame rails.
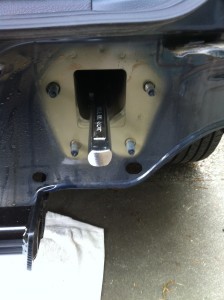
8. Tighten the Bolts
Now we’ve got all we need to be able to tighten up the bolts. Do so.
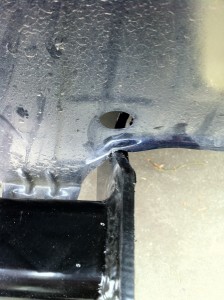
Also, when the bolts are tight, it may pull the hitch high enough to make slight dents where the hitch comes under the rear panelly thingy.
9. Rehang the Exhaust
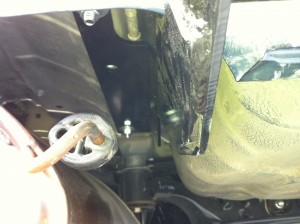
Now that we’ve got the hitch tight, we can hang up the exhaust again. This is simply reattaching those rubber hangers we took off near the start. I found it all relatively simple except for one hanger. The hitch now sits around one of the hanger pins and makes it kind of hard to fit your hands in there to push the hanger back on. This was probably the biggest fight of the whole install for me. I got the hanger sorta on, then used the wrench end of my (patent pending) Hitch Helper to push it on the rest of the way. The prongs of the wrench are spaced enough to let the pin sit in the middle, and does a good job of pushing the rubber hanger back onto the pin.
10. Reattach the Bumper Rail
This is just the opposite of how we took it off. Slap those eight nuts back on the bolts attached to the car.
11. Cut a Notch in the Bumper Fascia
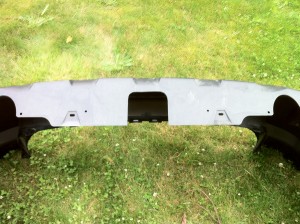
Part of the deal with this hitch being so close to the bumper, means that you need to cut a notch in the bottom of the fascia. Don’t worry! It’s on the bottom side, so is totally not visible to any passerby. Or really anyone unless they get under your car. Still might as well do a nice job though. I did the cut with some tin snips, and trimmed it up with a sharp knife. It’s just plastic so it’s an easy cut.
Also, the Torklift instructions say you need a 6″ x 6″ cut. That really is the perfect size. They tuned it from the last iteration where it said an 8″ wide cut. This is a much closer fit.
12. Reinstall the Bumper Fascia
Like the bumper rail, this is pretty much just the opposite of taking it off. Line up the tabs, gently push it all back together till it snaps in, the put back in the pop pins. With the exception of the center bottom one as we cut out that part of the bumper and the mounting tab has been bent back.
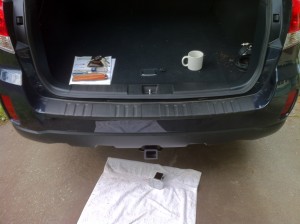
13. Admire Your Handiwork
This is a damn good looking hitch as far as hitches go. NOTHING but the receiver tube is visible. The bar and everything else is hidden behind the bumper fascia. Take a gander!
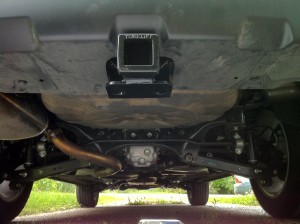
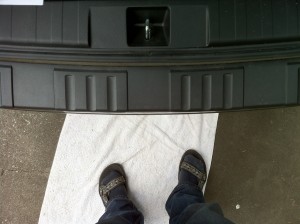
Also, like I said, it doesn’t stick out the back at all. Here’s a photo looking straight down the bumper fascia. Do you see the hitch? I don’t. That also means no shin bonking! YAY!
Summary
To bring everything to a close, use the Subaru instructions to get the bumper fascia and rail off, for everything else, pretty much follow the Torklift instructions with the modifications that having the bumper off allows us. Easier bolt placement, Not bending mounting tabs unnecessarily, and access to the top of the bolts for tightening.
Congrats! You can tow stuff!
Additional Photos
I’ve had a few requests for photos from different angles to get a better idea of how some things fit.
Heat Shield. Ok, this photo’s kinda hard to see, but it’s about the best I can get. The hitch gets installed OVER the heat shield, and ends up bending the flap over and against the spare tire well. On the very left is the muffler can, the black thing in the middle is the hitch, the silver bit is the heat shield, and the brownish-blackish thing is the spare tire well.
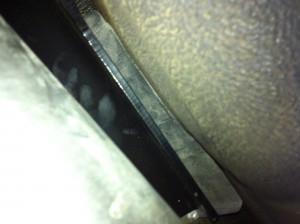
Spacing Around the Pin. There was some concern over using larger pins and having room for the safety chains. So here’s a couple photos. It looks to me that using a normal pin would be fine, a larger one I’m not sure. One fix would be to use some of those chain links with the screw gate on one side. That would extend the safety chain loop down and out of the way of a larger pin.
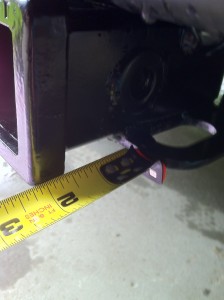
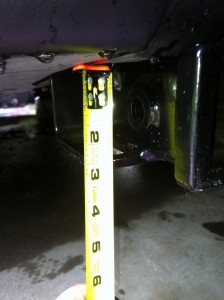
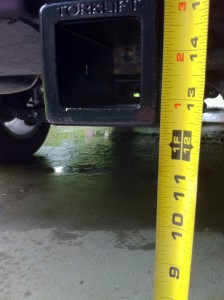
Total Ground Clearance. This one’s pretty self explanatory. With no load (nothing significant in the car, and no trailer attached, how high off the ground is the receiver. Looks like almost exactly 12.5″.
