I’ve previously posted about building and printing objects with my 3D printer, but I thought I would show a bit more of some of the steps involved in making an object. In this case, I have a circuit board (which I’ll discuss in another post), that I wanted to make a case for.
For the most part, for me this means that I’m going to design a case. If it were a common sort of device like a Raspberry Pi, there’s a million 3D printable case designs on thingiverse. Since this is a custom board, I’m going to need to make one. I can’t say I have a whole lot of experience with 3D CAD programs, nor am I willing to spend the dough on a professional one like solid works, so I use OpenSCAD, which uses a programming language type environment to define 3D objects.
I didn’t grab screenshots right at the start, but this is still fairly early on. I’ve defined the general shape of the box, as well as some standoff supports for the board.
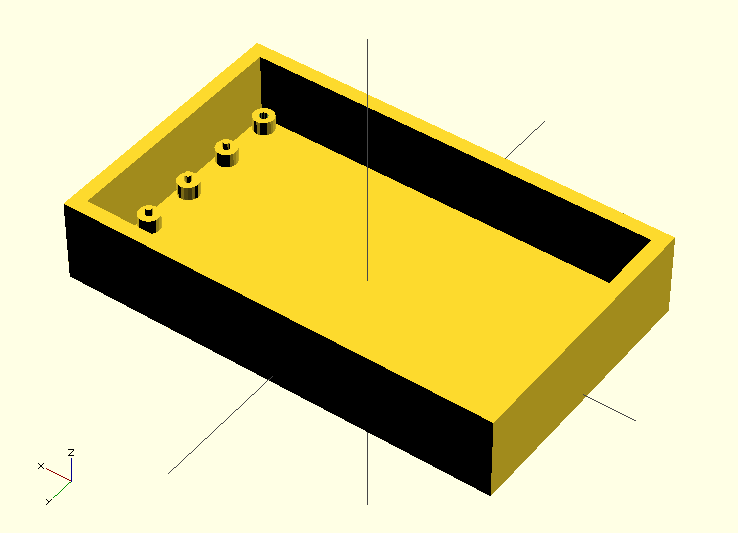
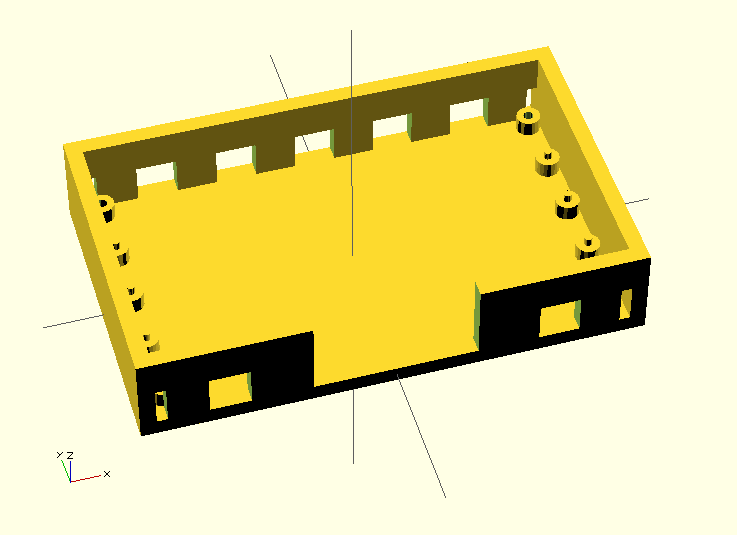
This board will put off a bit of heat though, so I need to add some air vents. I’ll remove chunks from the longer walls of the box.
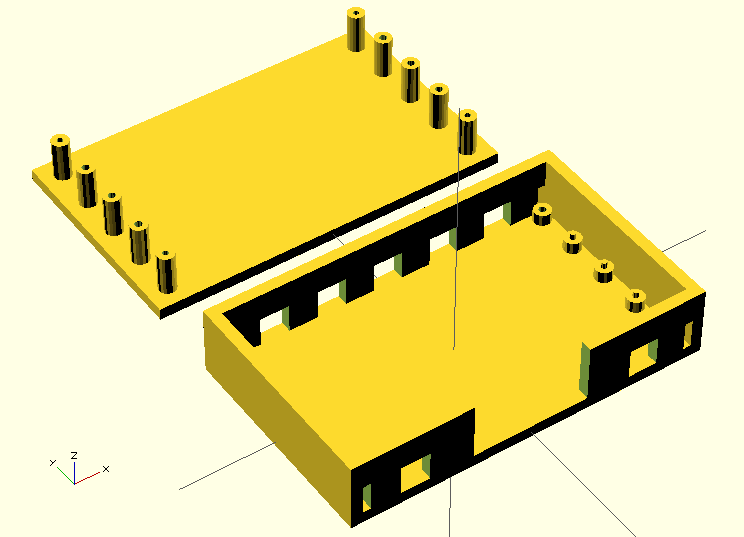
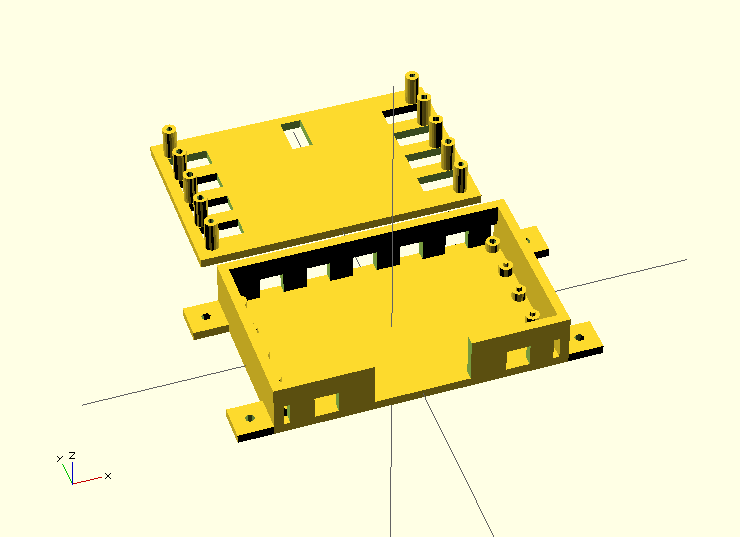
Of course, the box will need a lid, and we’ll make posts that reach down to mate with the supports on the bottom, to hold the board in place. We’ll also screw the lid down through the bottom to hold it in place.
Next, we need to add the holes in the lid for the connectors to fit through. Otherwise we can’t actually attach anything to the board.
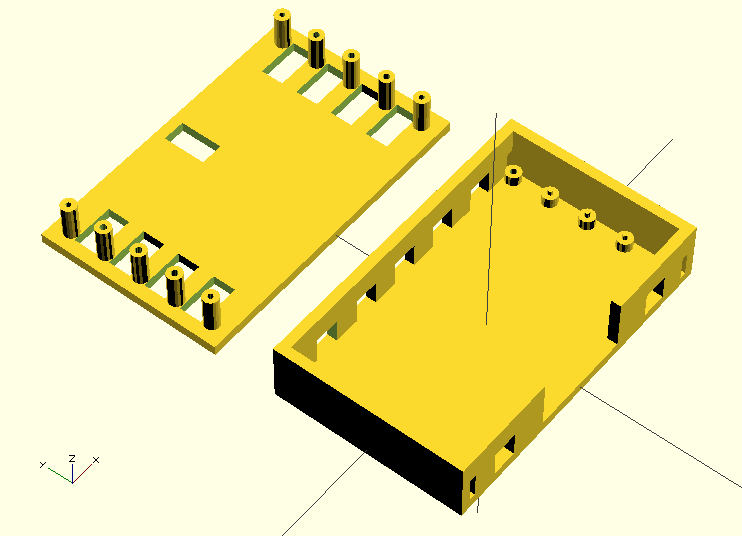
Finally, lets add some mounting tabs to the case so we can attach the case and board to a board or something to keep it positioned where we want it rather than hanging in the breeze.
Finally, let’s print the thing!
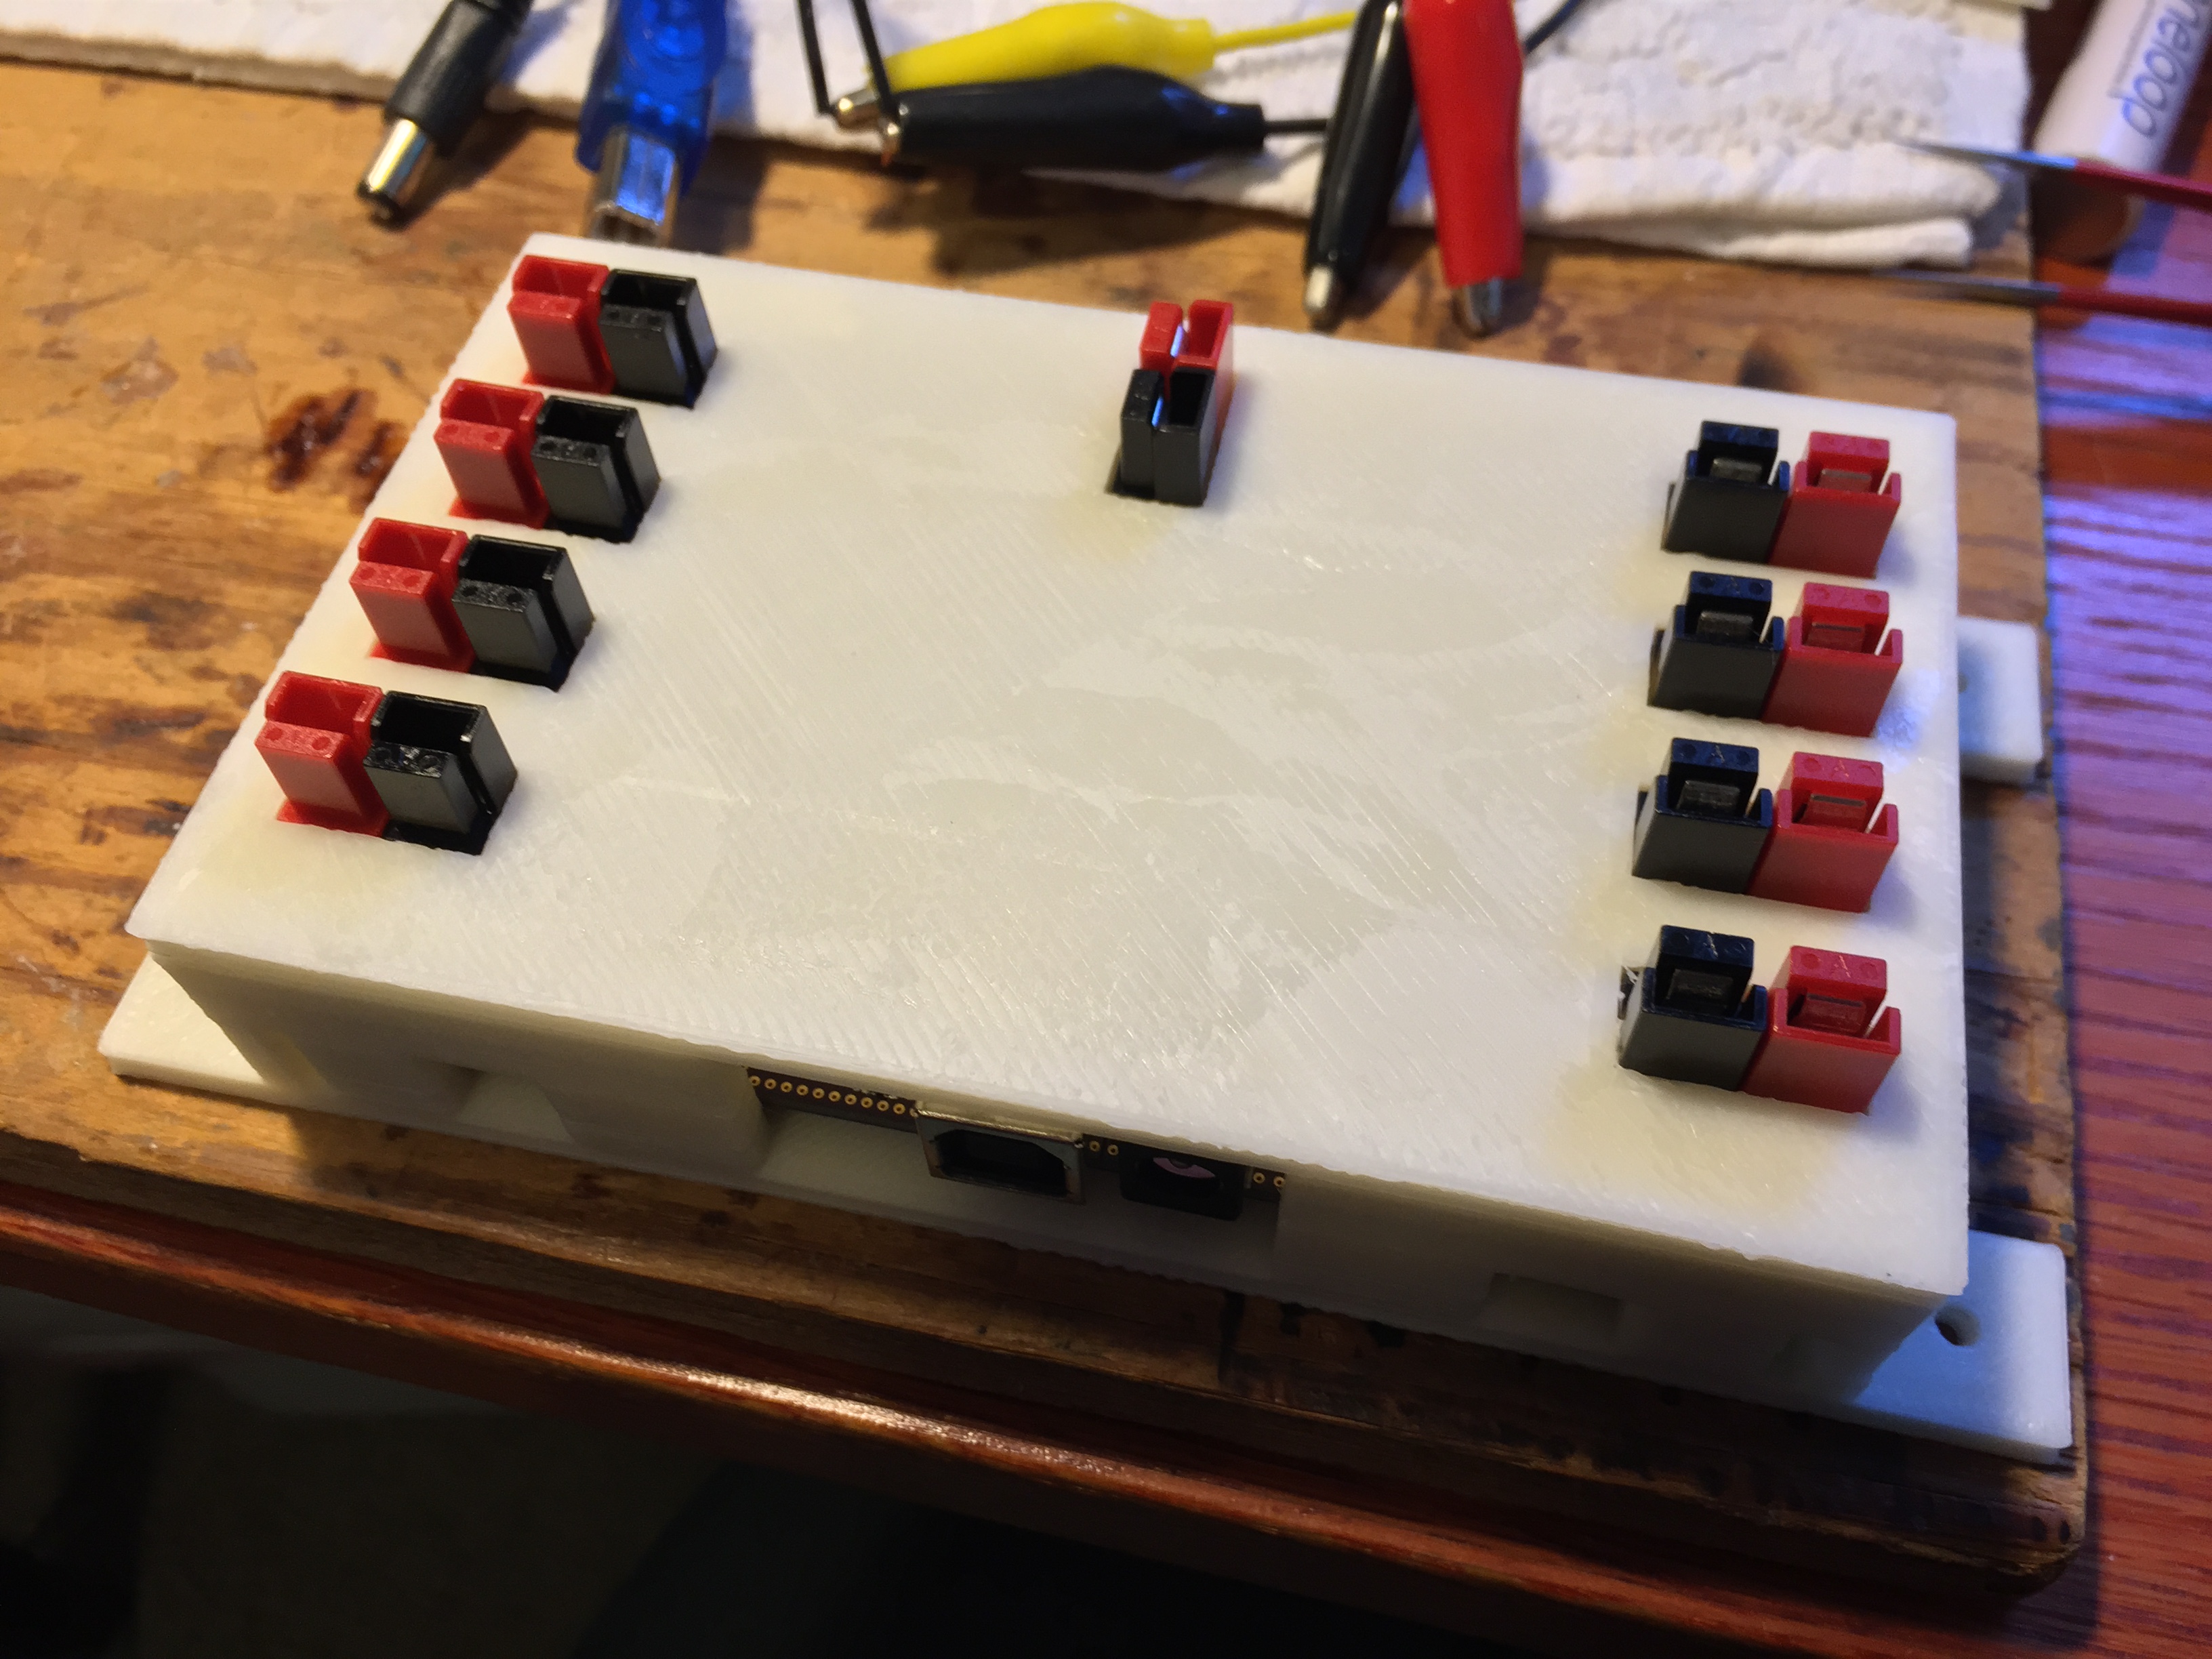
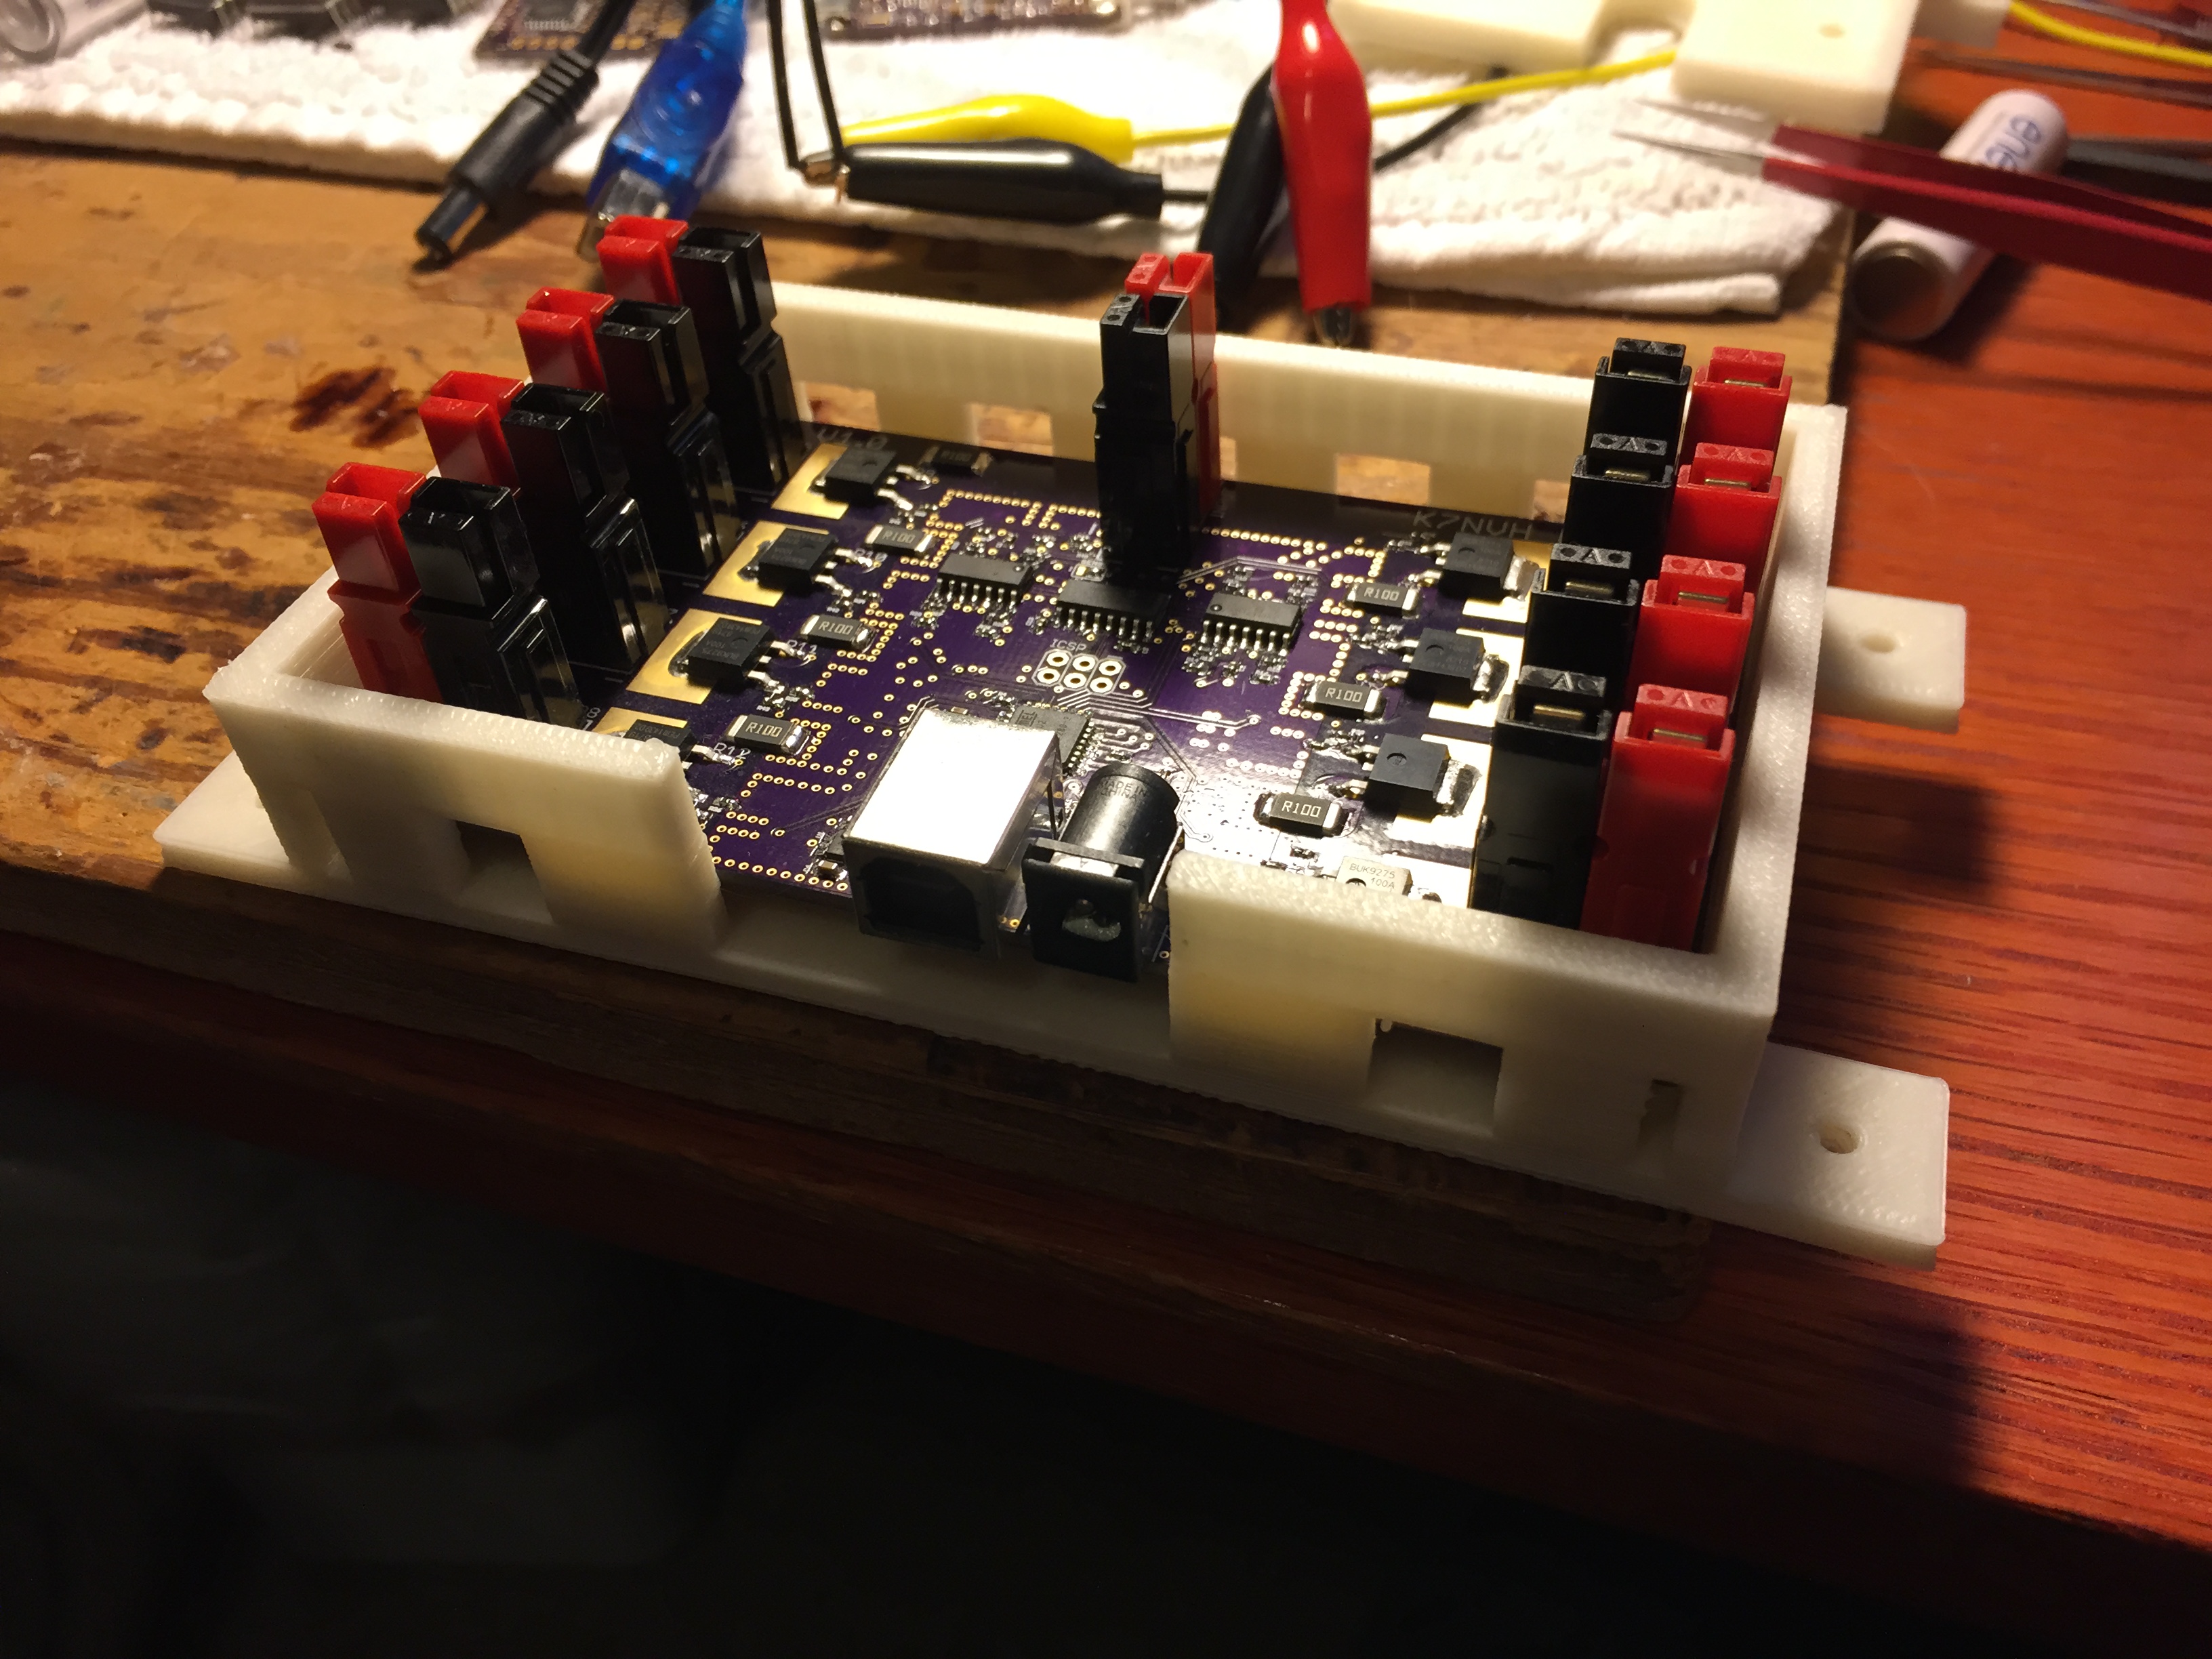
The board in the bottom portion of the case with no lid.
A view of the lid upside down before attaching it to the box.

And finally, the box assembled with the board inside.