Recently I borrowed a battery analyzer from a friend of mine to test a bunch of lithium batteries I had laying around. I found it to be a very useful tool and thought about the concept of making one rather than buying one from West Mountain Radio
So, I dug around through my pile of scrap bits to see what I could scrounge up to put this thing together. Found an old processor heatsink/fan to keep things cool, found a big mosfet from an old laser printer to control the current flow, grabbed an old 50W halogen light bulb to use as the power resistor E.G. the load, and a 0.11 ohm resistor to measure the current flow with. With these few bits, I had the majority of the system.
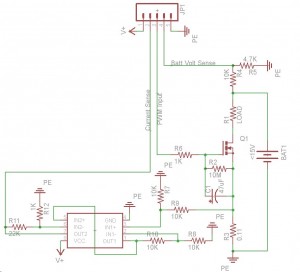
Now I had to design a circuit setup that would combine these bits into a working instrument, as such I came up with this:
You’ll note the only bit on the schematic that isn’t really representative of what it really is, would be the box near the bottom, that’s a dual op-amp. More specifically the MCP6L92. It’s a basic differential op amp with the addition that it’s a Rail-to-Rail amp meaning that the output can get very close to either ground or the positive rail. That’s an important factor in this circuit, as the current measurement circuit puts the output very near to ground.
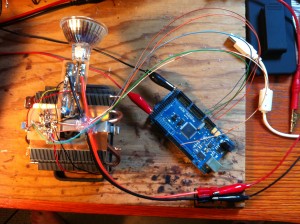
Anyway, I used the toner transfer technique and etched a couple of small circuit boards, put the bits on them, and wired them up. Here’s the result of the circuit along with the inputs/outputs connected to an Arduino.
So, to summarize, the arduino runs the show, it measures the battery voltage (to know when to stop discharging), measures the current flow (to integrate the Ah capacity of the battery and to regulate the current at a value I want), and outputs a voltage signal to control the mosfet to regulate the current. We start by ramping up the voltage output till the current measured hits the set point, generally 1 Amp. Then we continue to measure the current, adjust the set voltage, and integrate the time and the current draw to get our capacity, and then shut the system down when the battery voltage gets down to the minimum voltage (Most batteries don’t like actually being discharged to ‘0’. A 0% charge is actually generally significantly above 0 volts).
Anyway, it seems to work great. I’m quite pleased with it, and based on having a stash of parts, my new battery analyzer cost me a total of $0 (Sure, some of those parts I may have bought for cheap a few years ago, but I mean that I didn’t have to go buy anything for the project).


