Ever dreamed of having the ultimate portable system? Now you can! Take your standard pc, add an LCD screen, there you go! Here are the steps.
Step 1. Acquire an LCD panel. Make sure that it runs on either 12 or 5 volts, and that it doesn’t need more than, I dunno, say 6 Amps. Mine was listed at 4.45 Amps, and seems to run fine. Also, make sure you don’t care deeply about this screen, there is a chance you may break it. I got mine for free at a yard sale.
Step 2. Remove all the casing from the screen. There should be a bunch of needless plastic casing on your screen. Take it off. LCDs like to be naked just as much as you do. Make sure to keep the metal mounting hardware though, it may come in handy later. Also, be sure it is unplugged. Don’t be stupid. These screens carry high voltages, no matter how low the input is.
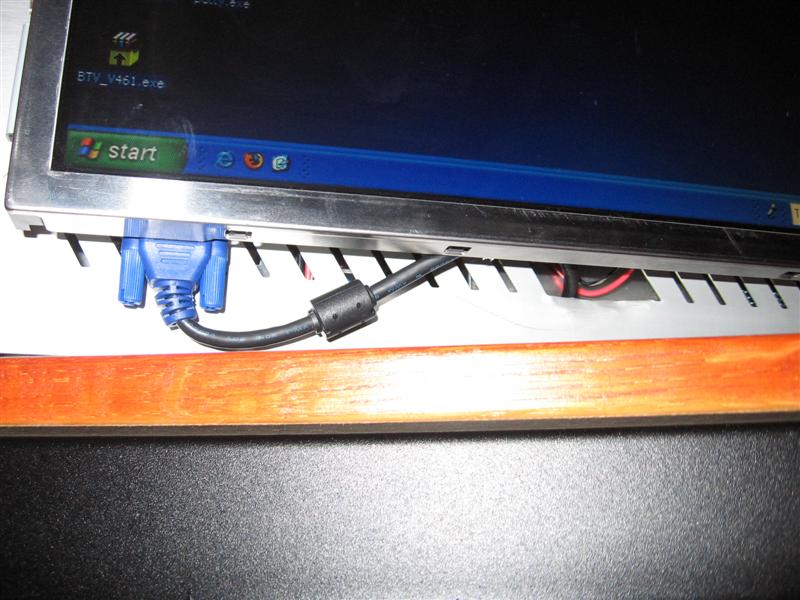
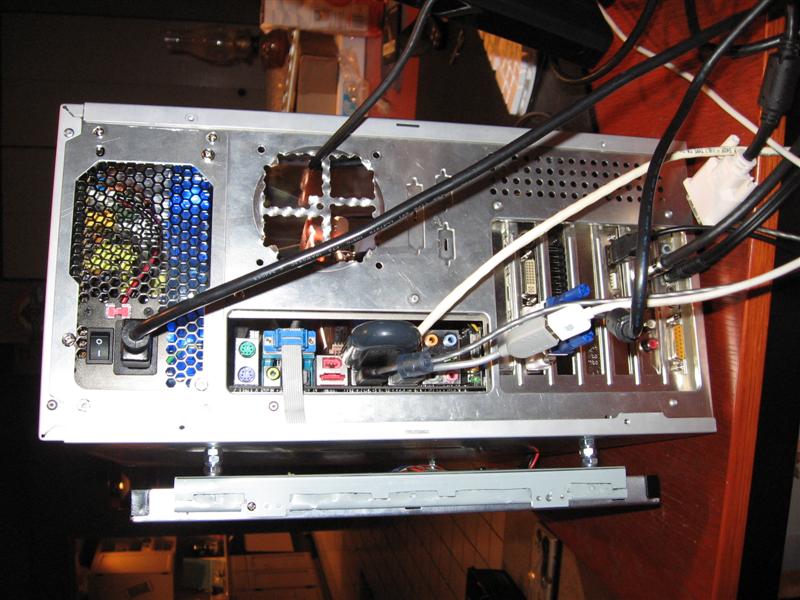
Step 3. Solder some wire to the power input of the screen. Either that or use the cable that came with it. By any means, you need to get a molex power connector so that you can power the screen off the system PSU. MAKE SURE YOU GET THE RIGHT POLARITY AND THE RIGHT WIRES IN THE RIGHT PLACES! You can fry your whole damn setup if you aren’t careful here.
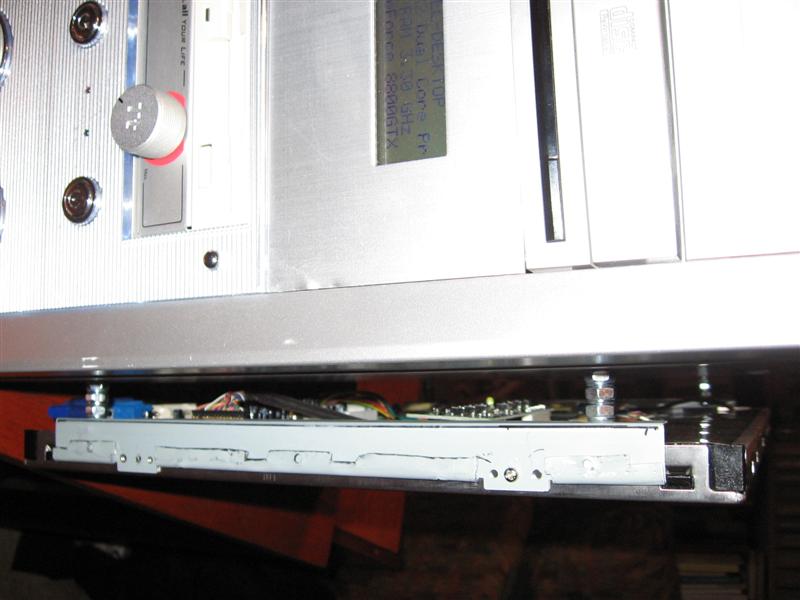
Step 4. Organize and glue all the circuit boards to the back of the screen, I used hot glue. Make sure that none of the contacts on the boards touch the screen casing. It could short out.
Step 5. Now a trip to your local hardware store. I recommend actually taking the screen and the case panel to the store so you can see just what nuts, bolts and washers will be required to mount the screen securely to the case, while still leaving breathing space between the case and the circuit boards on the back of the screen. Make sure you have the proper tools for attachment. You may need a drill, screwdrivers, tin snips, and possibly a variety of other tools, but I only needed, some pliers, a drill, tin snips, soldering iron, hot glue gun.
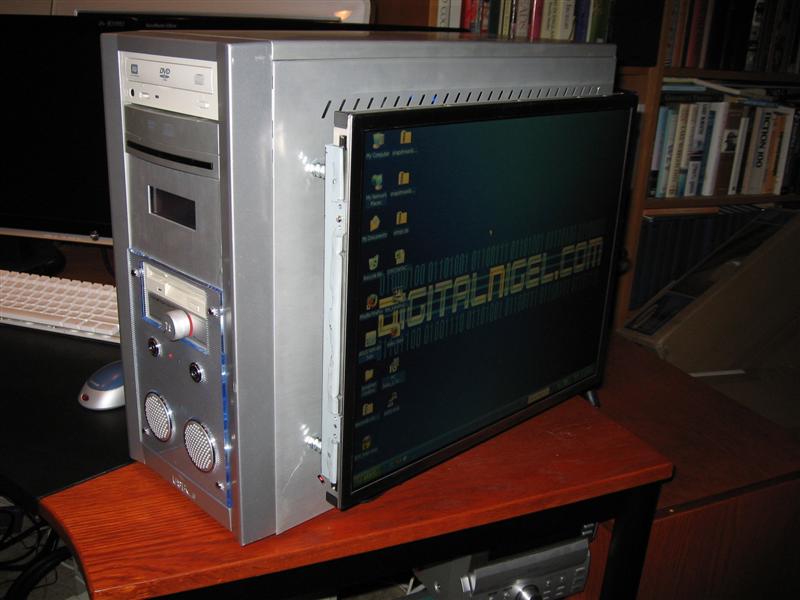
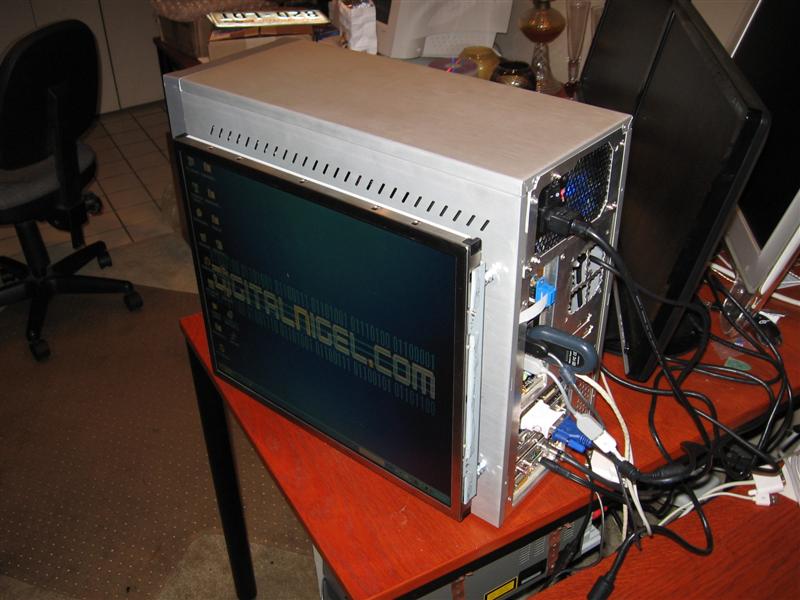
Step 6. Frankenstein time! Start attaching the screen to the panel with the hardware you got. Once it is all attached, go ahead and try to fit it to the case. The bolts on mine conflicted with some needless extra metal in my case, so I had to cut that out. Once that was done, it slid on quite nicely.
Step 7. Hook up the power and the video input. Make sure you got all the connections right. Make sure nothing is shorting out on anything else.
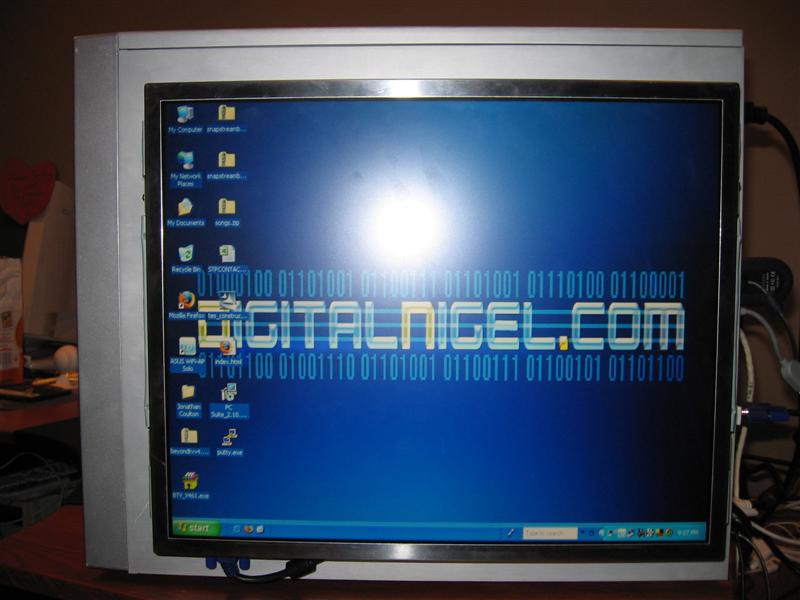
Step 8. Cross your fingers, cover your genetailia, and hit the system power button. If you’re lucky, IF YOU’RE LUCKY! It won’t explode in a fireball of screaming death. If it does, at least you protected your naughty bits. Anyways, Hopefully, the screen has powered on, the system is booting, and you have a beautiful new addition to your case that even you in your hopeless meaningless shitty existence can be proud of.
Step 9. Post the pictures somewhere! Hey, you gotta show off your masterpiece somehow. The internet is a good place to start. After all, that’s what I’m doing!
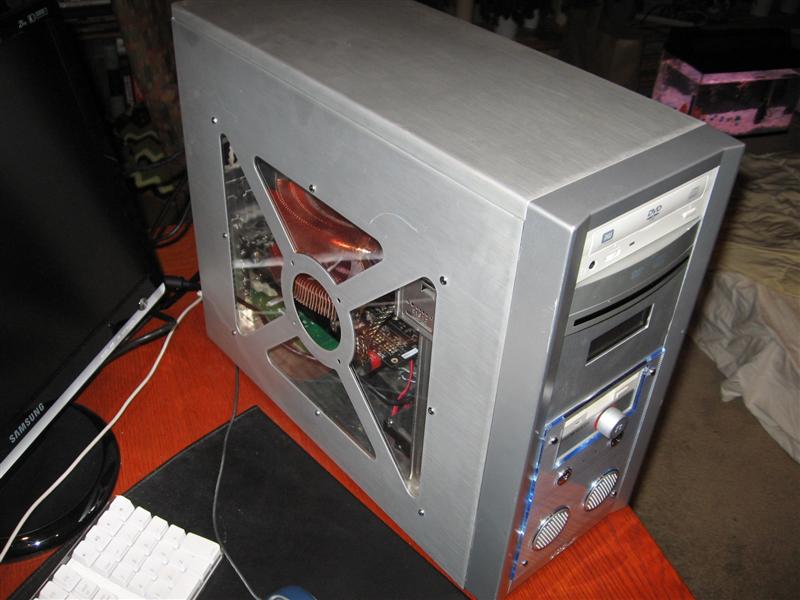
Here’s my page o’ pics!